My $300.00 72 Vega GT build, to replace the departed 76

Tell everyone about the progress of your project! Please respect people's threads.

Moderator: Moderators

My $300.00 72 Vega GT build, to replace the departed 76

Postby 76Vega » Sun Jan 01, 2012 2:39 am

HI,
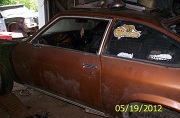
I'm new to these forums but i have owned alot of Vega's and Monza's in my earlier years, My brother in-law found this one for me on craigslist for $200.00 so we hopped in his roll back and went and got it, it is in rough condition, but i've got a ton of time on my hands and no cash so it will take me awhile to get it to something solid before i make a decision on what motor/trans combo I'm going to put in it. (more than likely the 67 327/325hp i have sitting my garage and if i can find one, a 4 speed transmission).
It has a ton of rot which most of which was covered up with fiberglass, but it's getting to the point where these cars are getting harder and harder to find and i feel that almost any car can be brought back to life as long as you take your time and do it correctly, even on limited funds.
Please don't be afraid of tossing me some ideas/hints/tips, as i have been looking at some the other Projects on here and i have to say my fabricating skills are no where near what most of you are doing.
So lets get started with some pics.

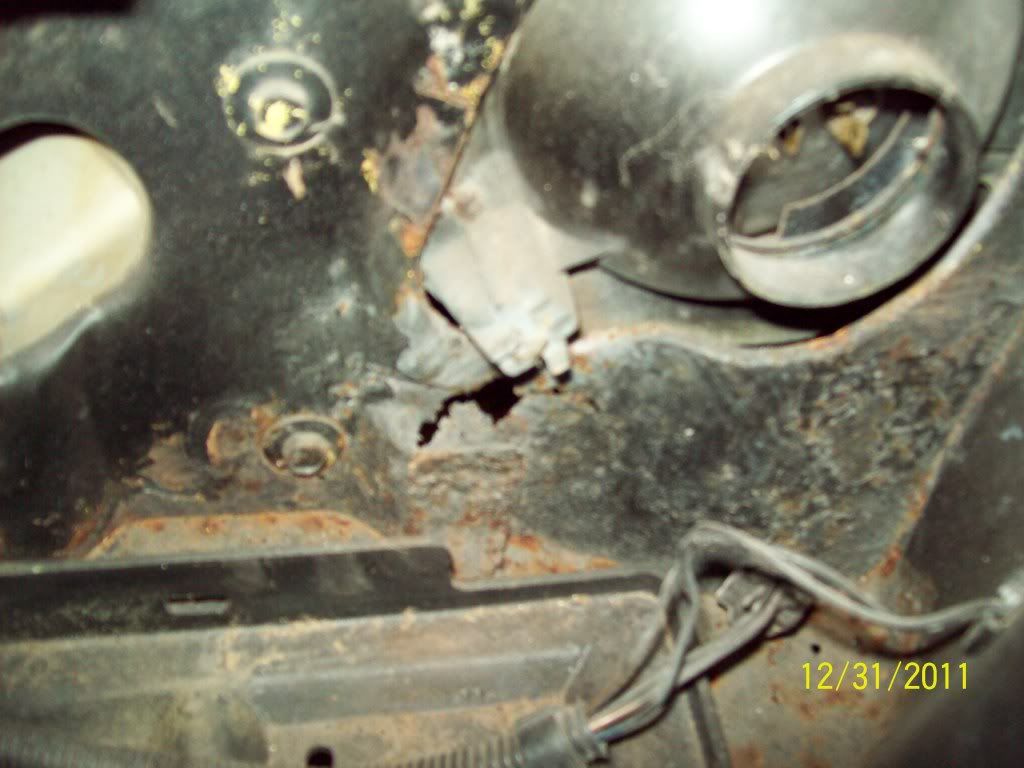
Below right headlight
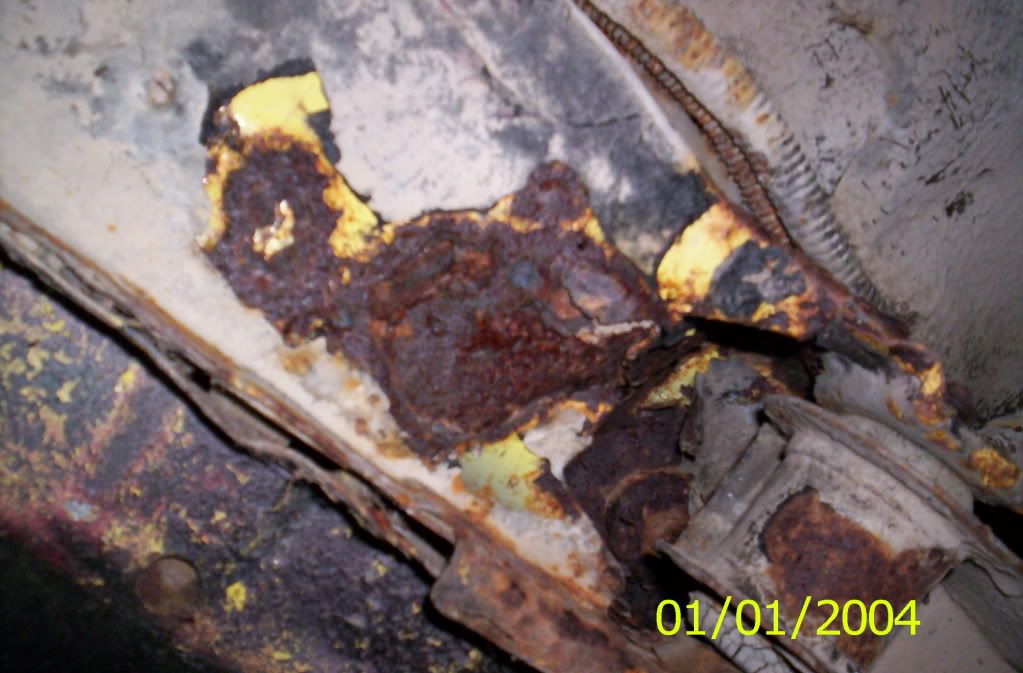
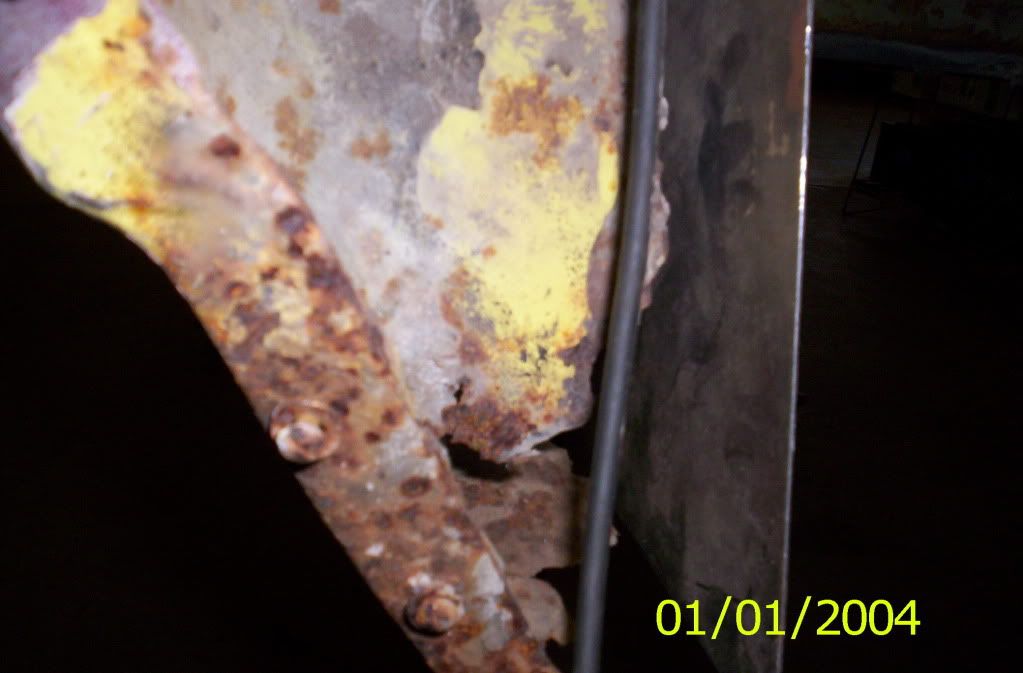
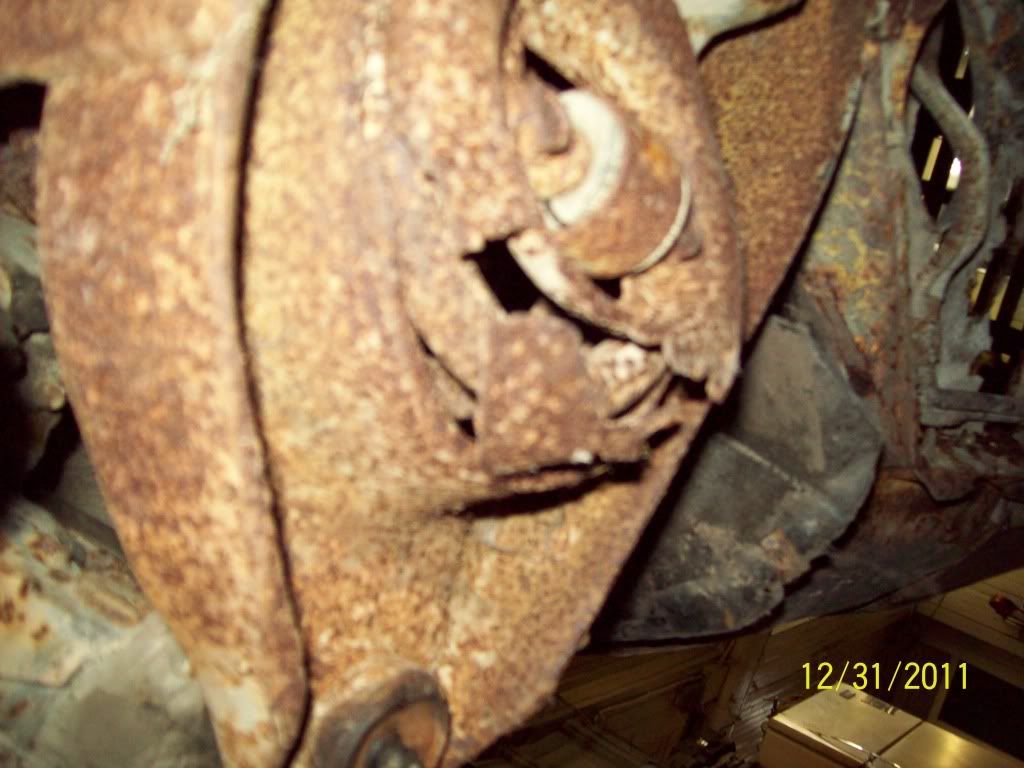
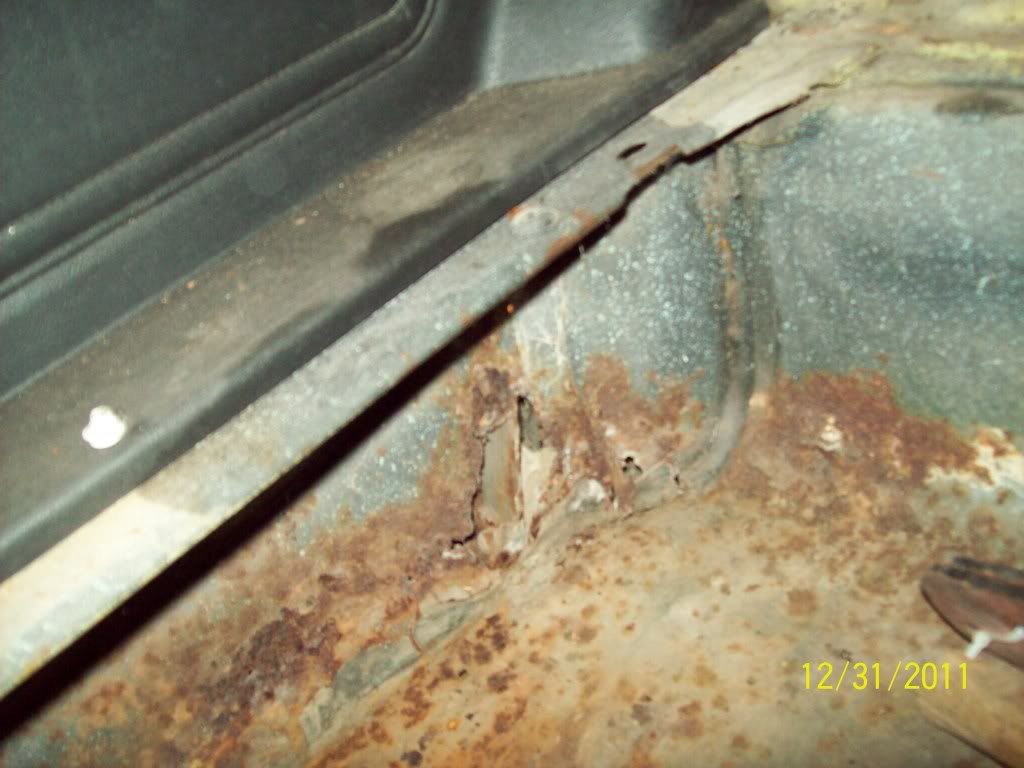
Image
right Lca support
Image
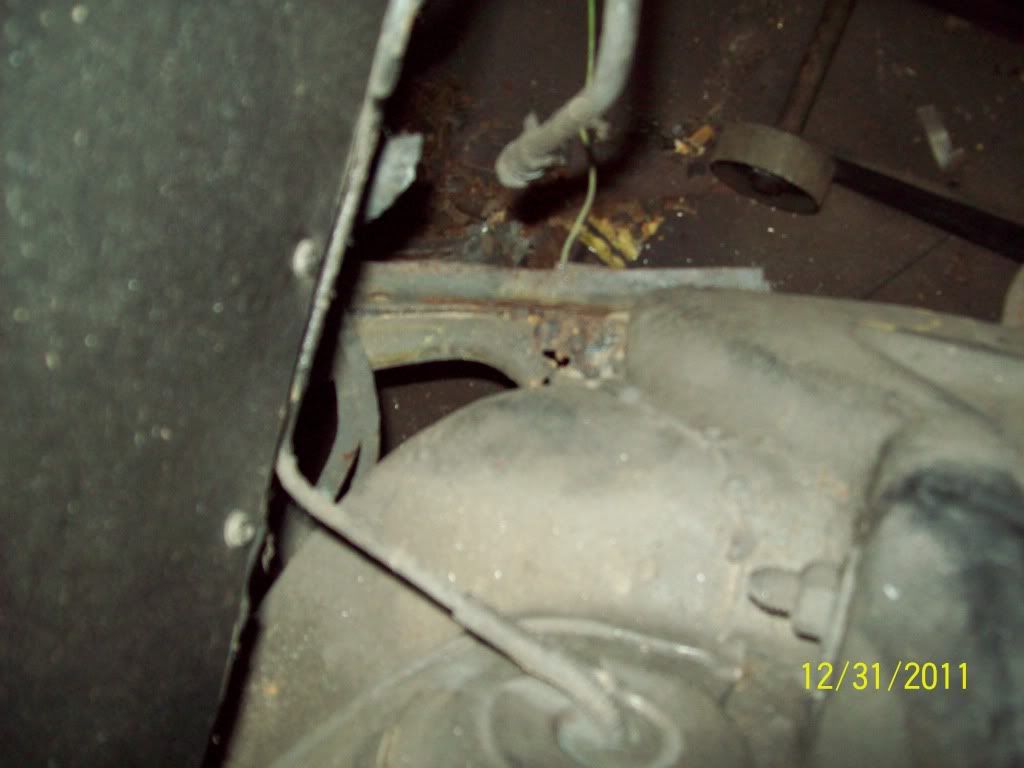
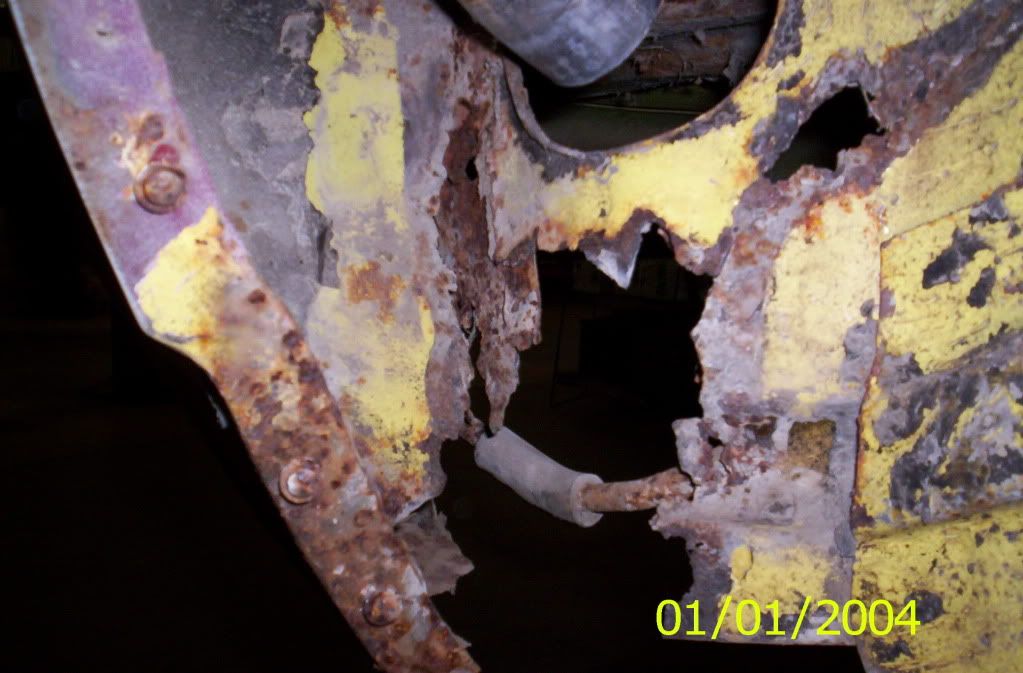
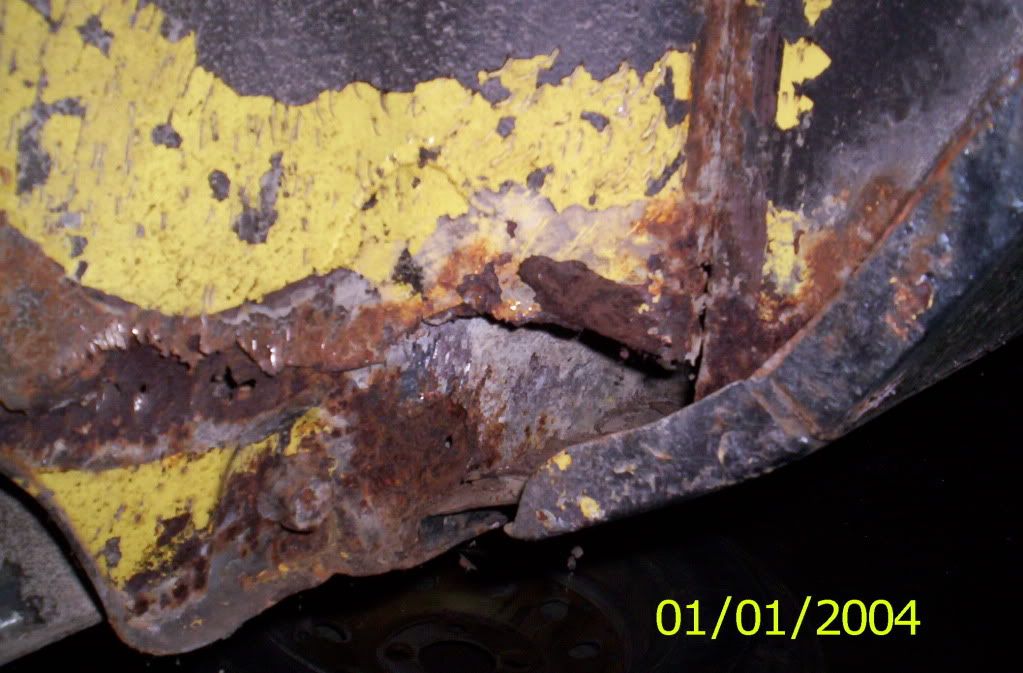
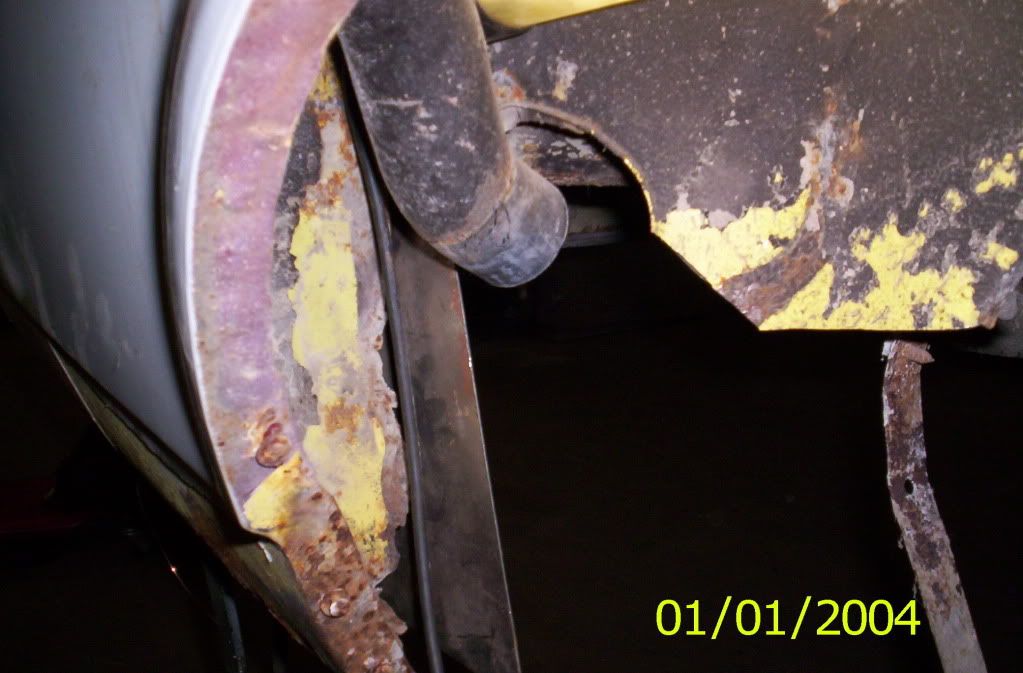
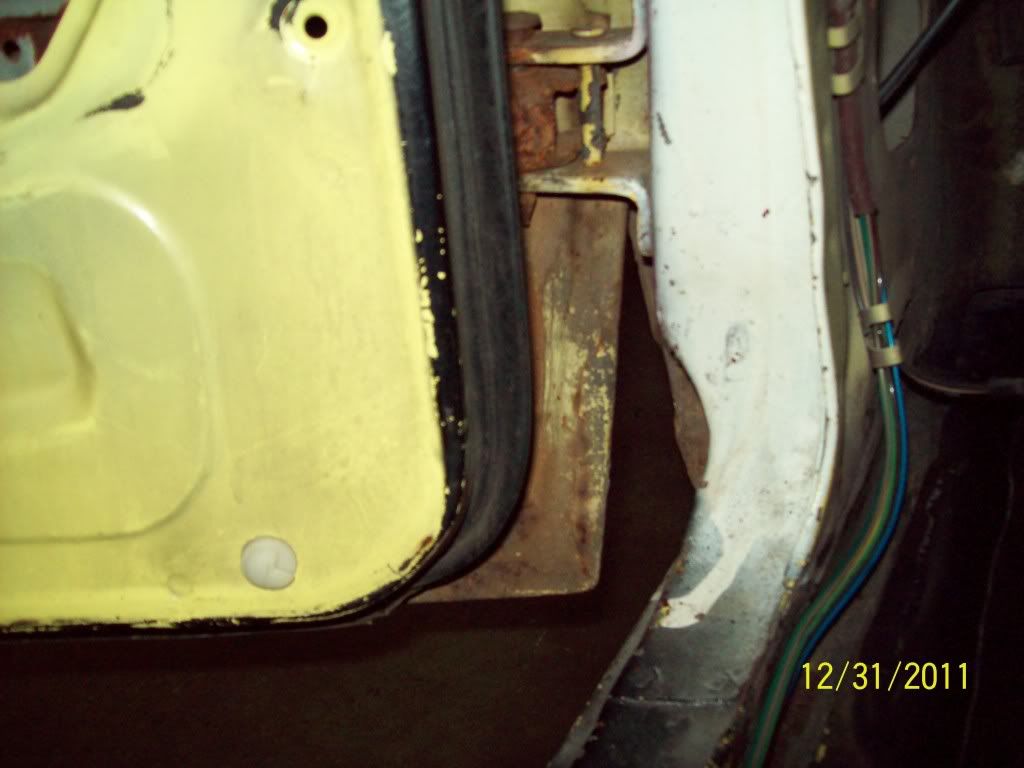
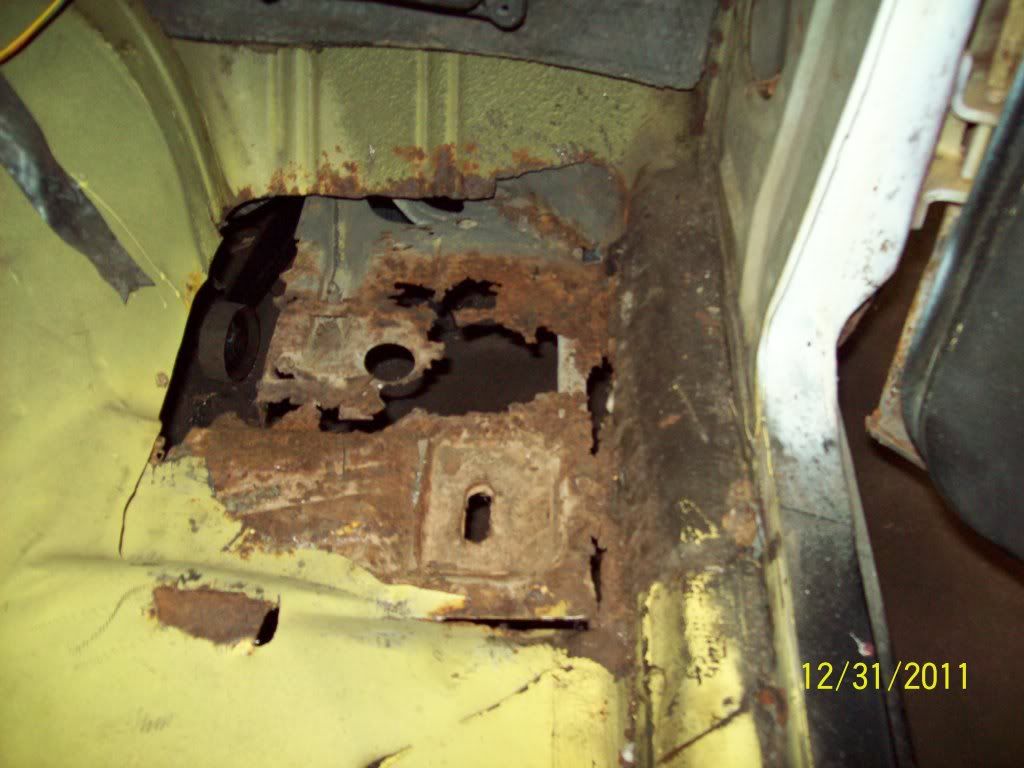
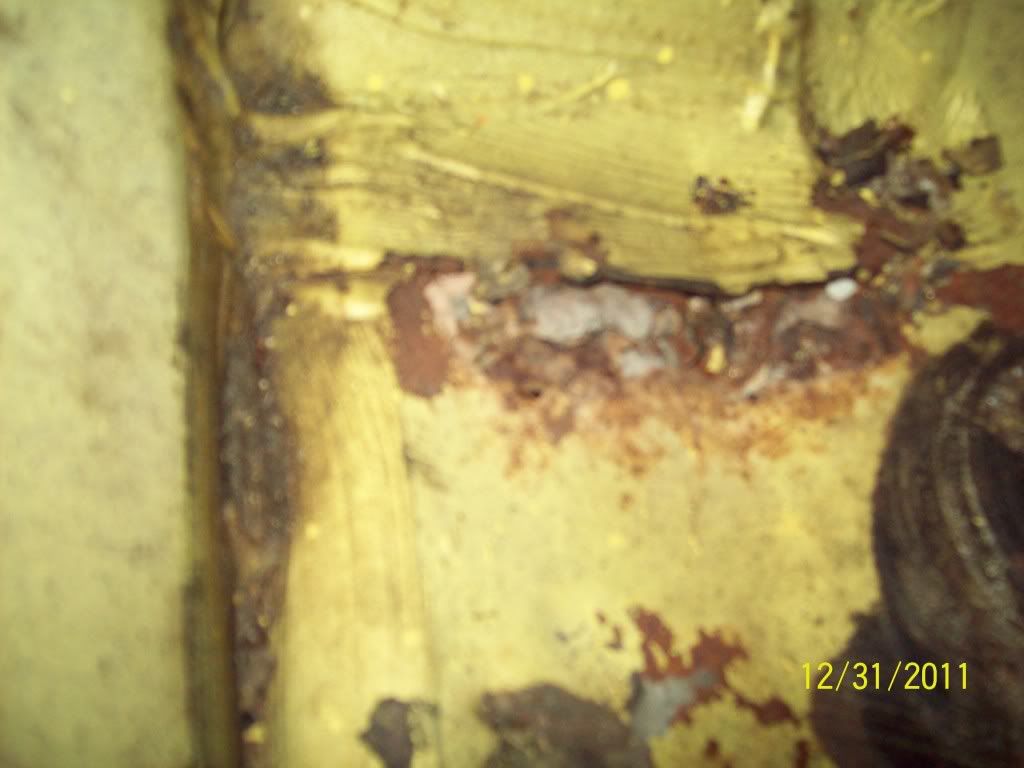
Left front corner where the charcol canister would have sat
Image
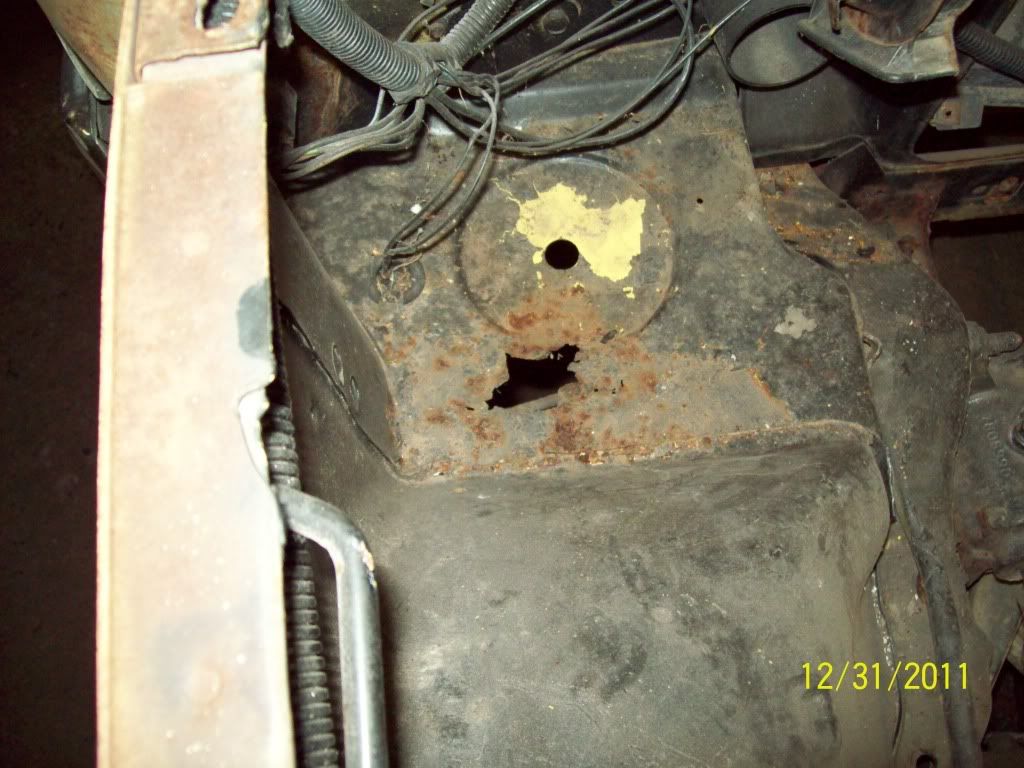
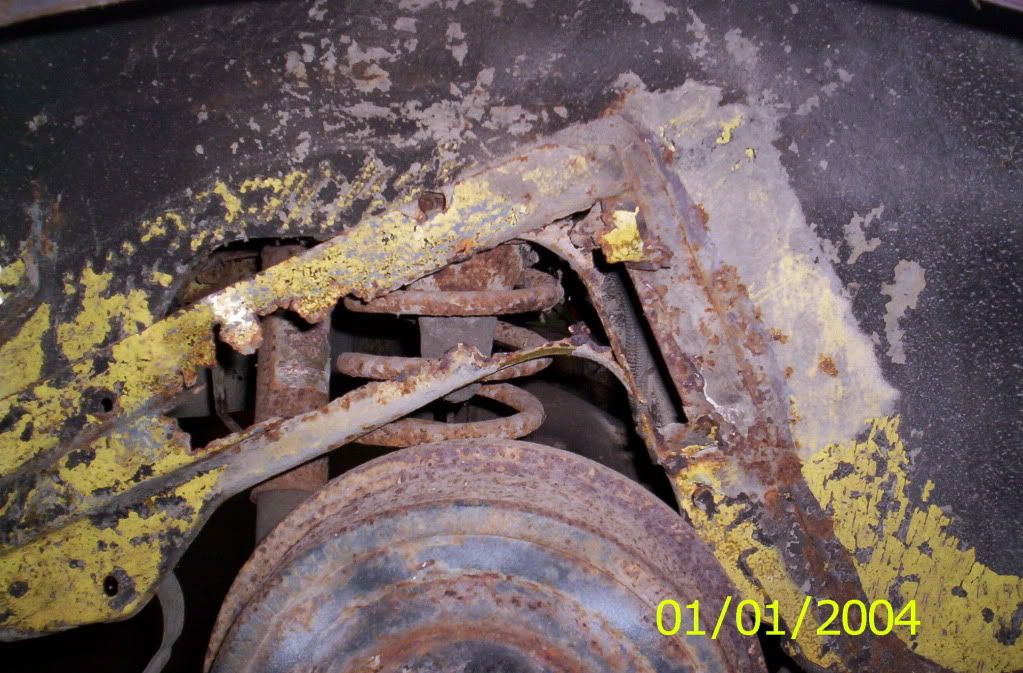
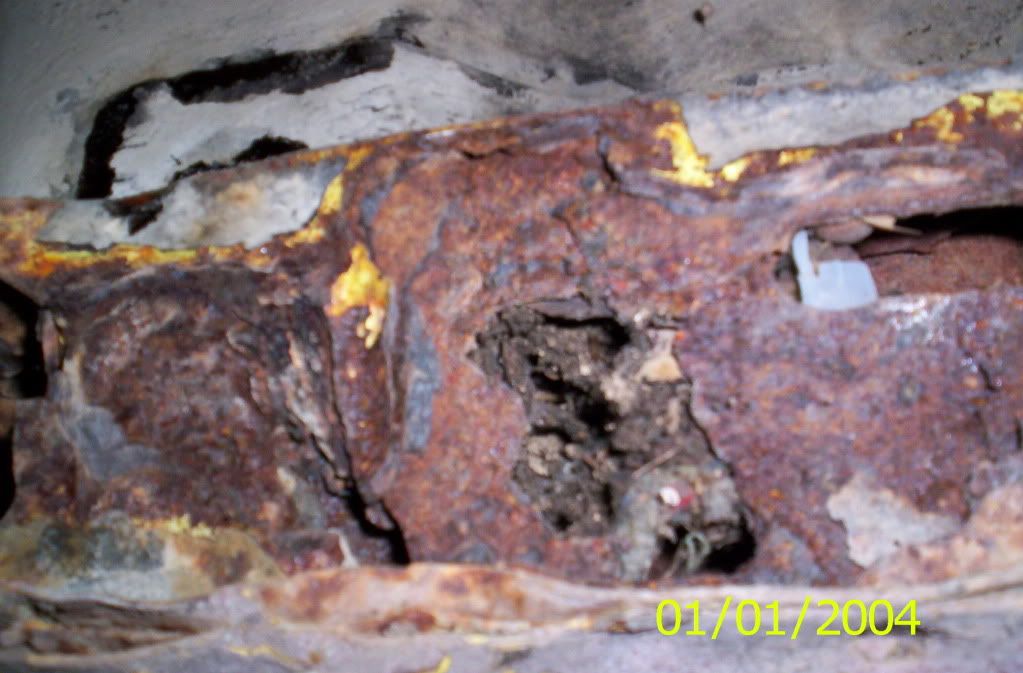
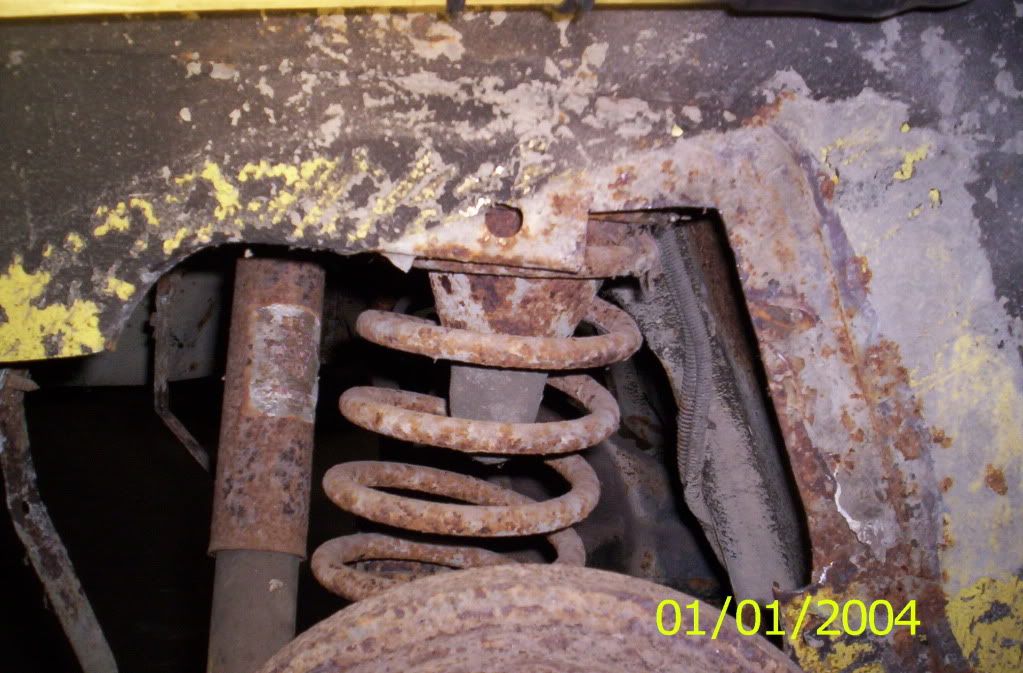
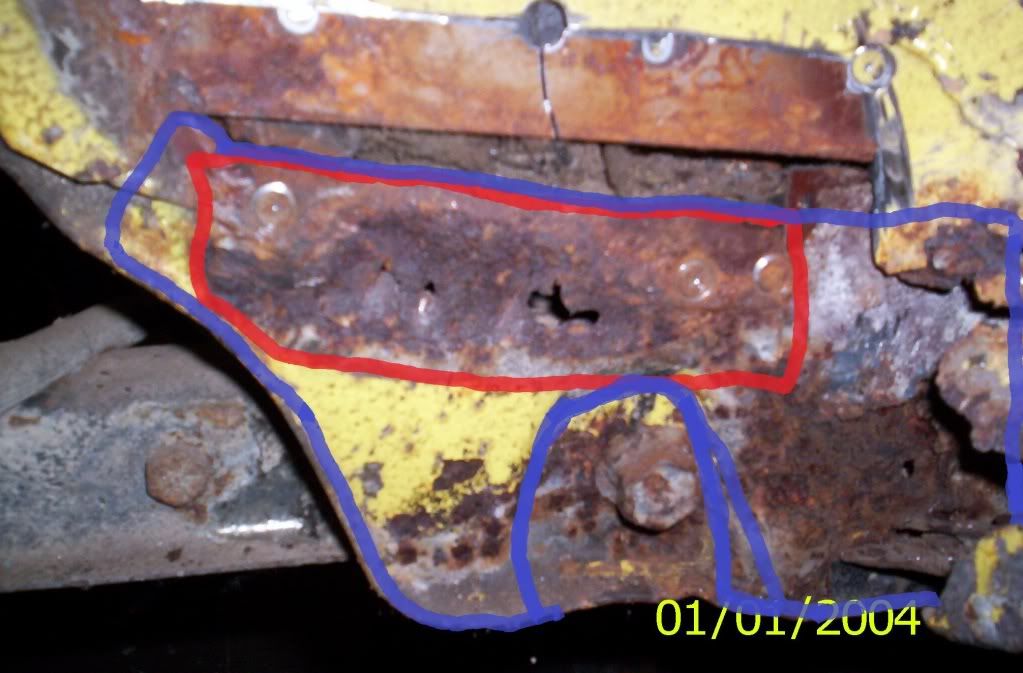
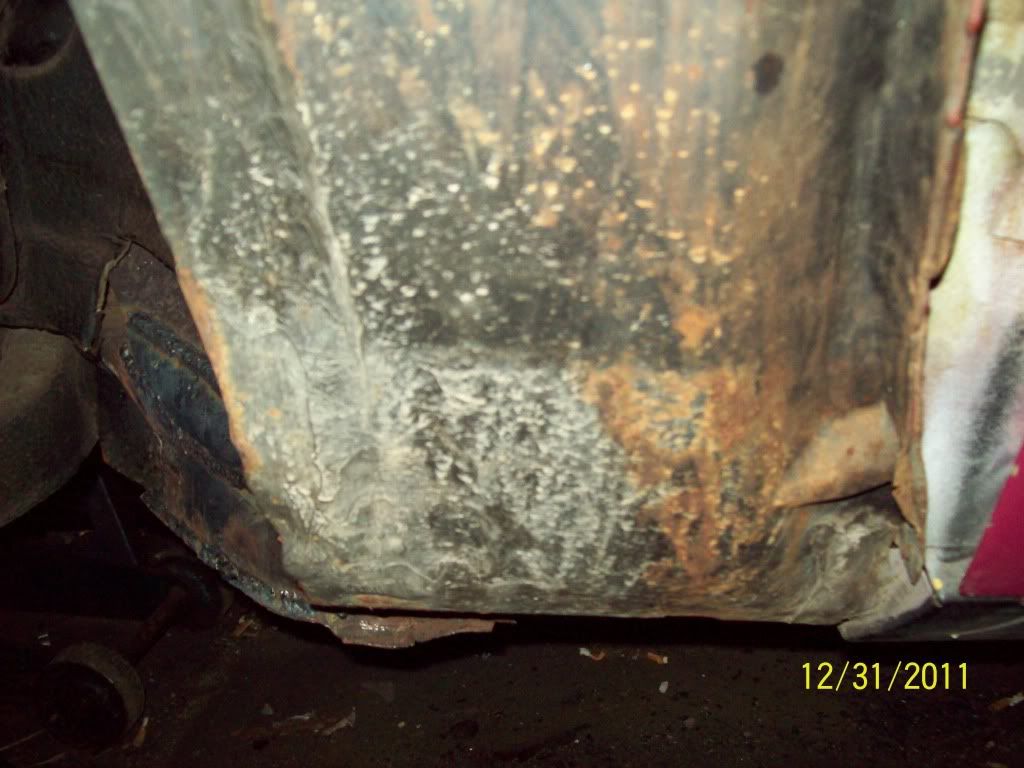
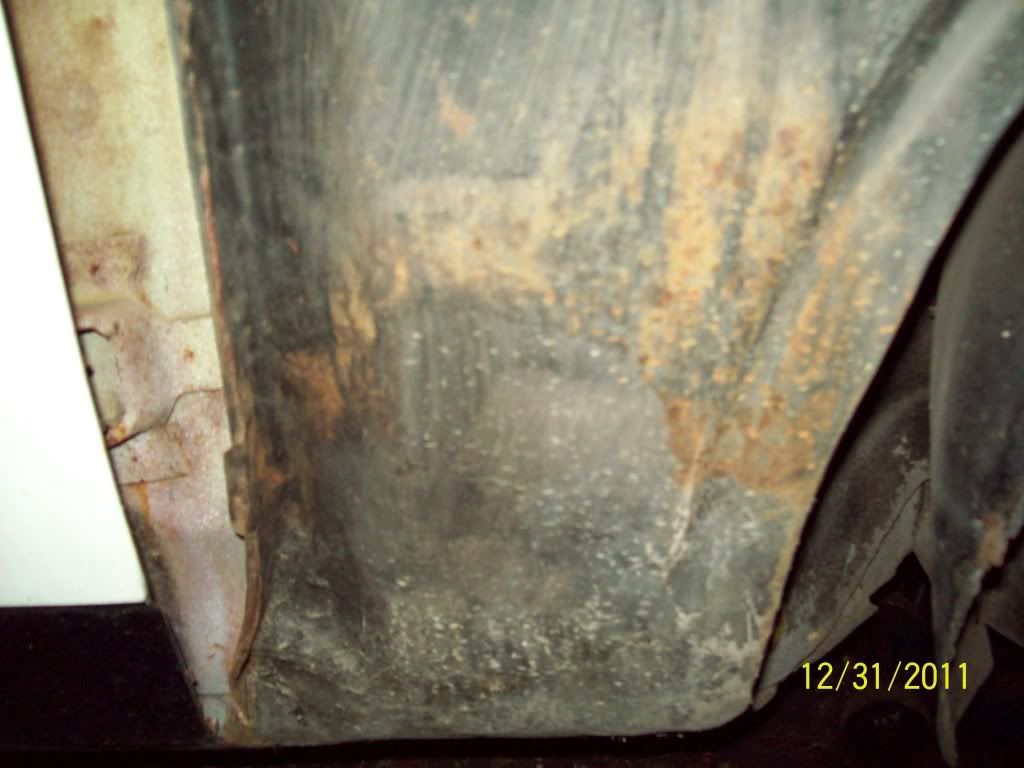
Right side shock tower
Image
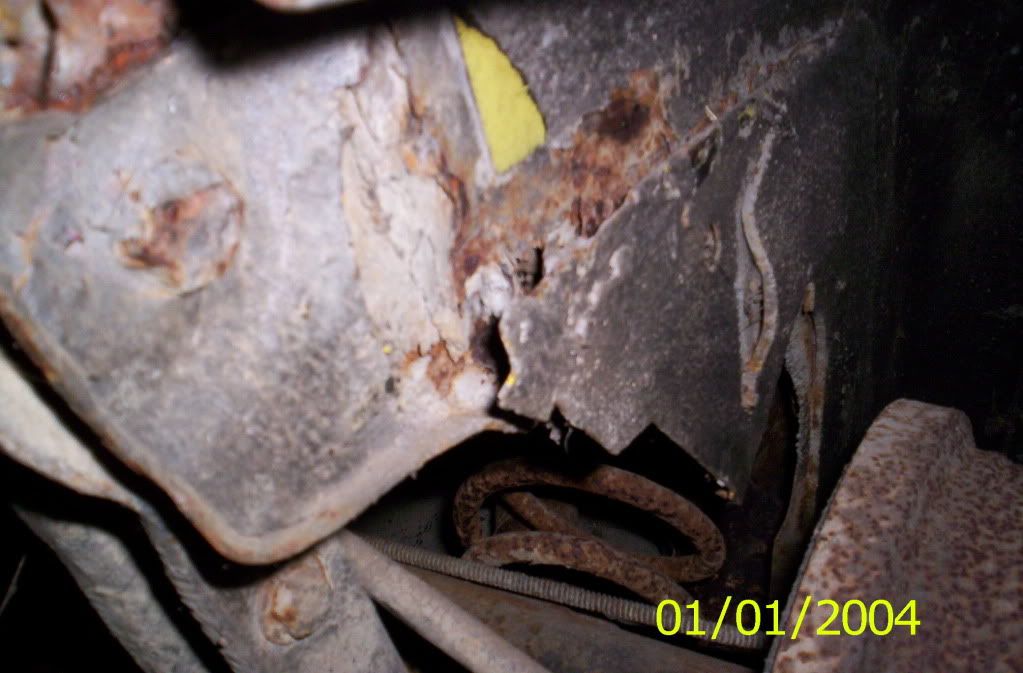
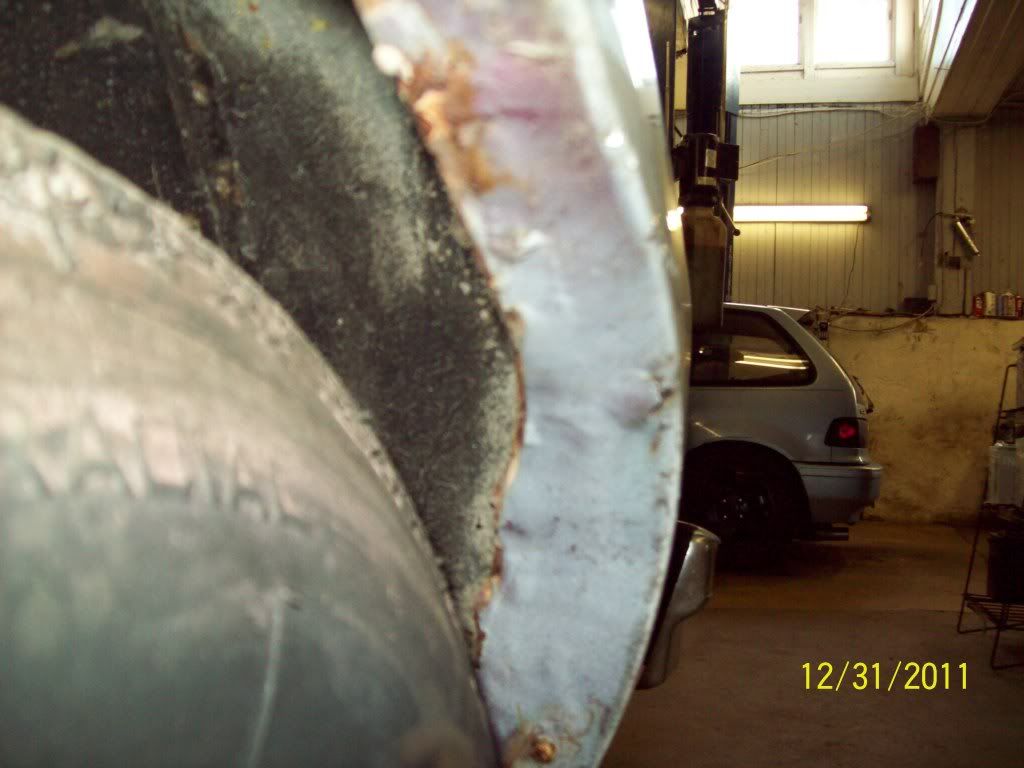
Right lca with spring hanging out the bottom
Image
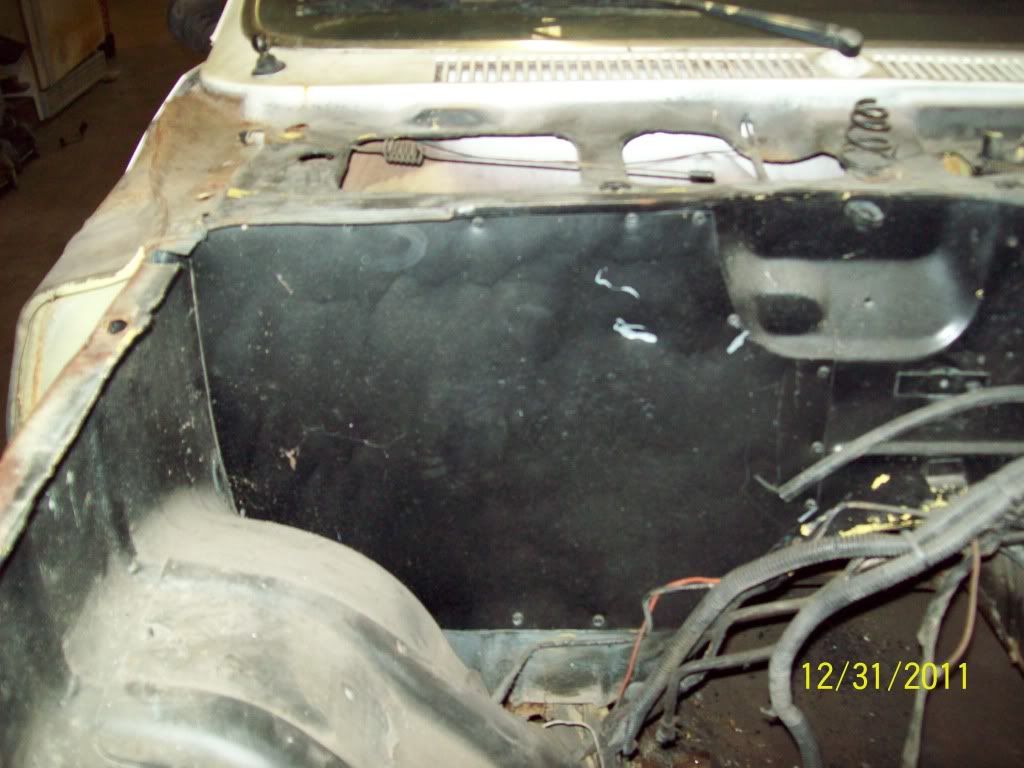
Previous owner took out heater core and blower motor, I may put them back in as i do plan on driving daily
Image
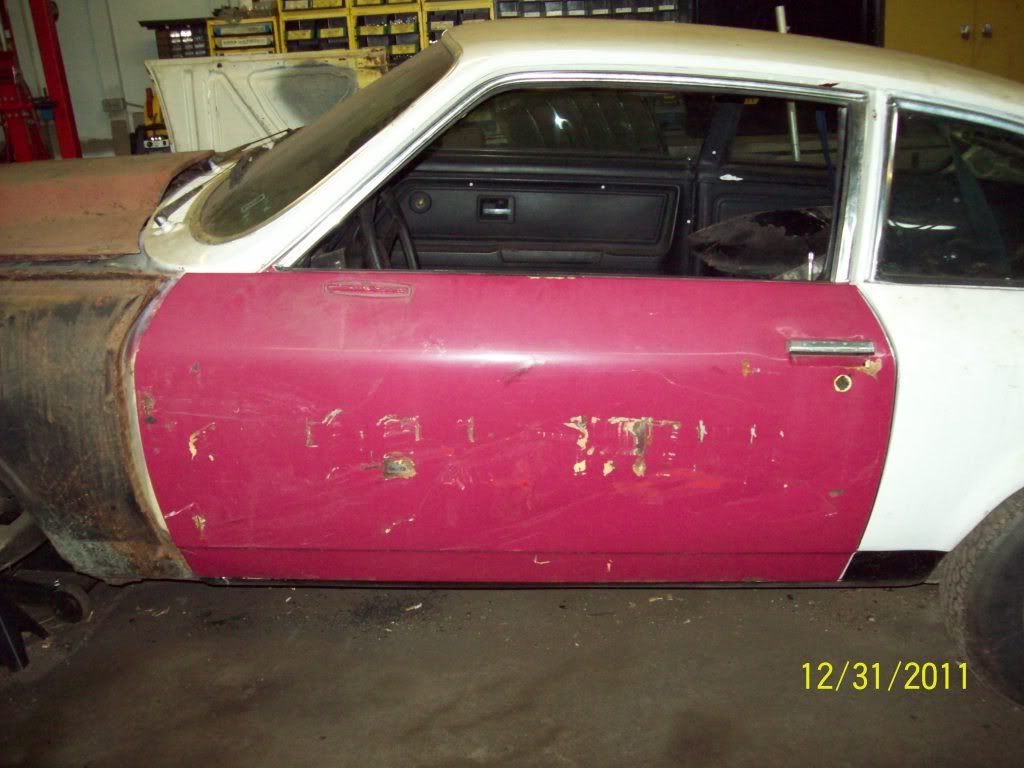
My $25.00 door i found on craigslist, it's dented but not rot.
Image
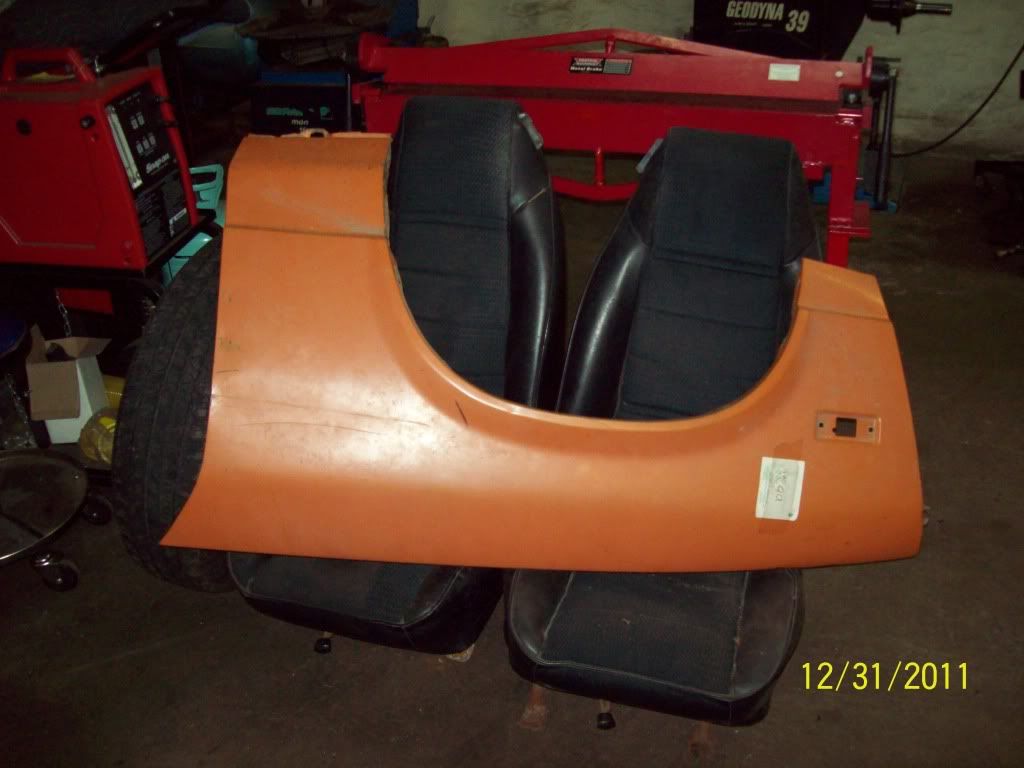
Left front fender $45.00 on craigslist, small crease and some small dings, well worth the price, also the seats from out of the car, not in to bad of condition.
Image
rear corner of left door from craigslist
Image
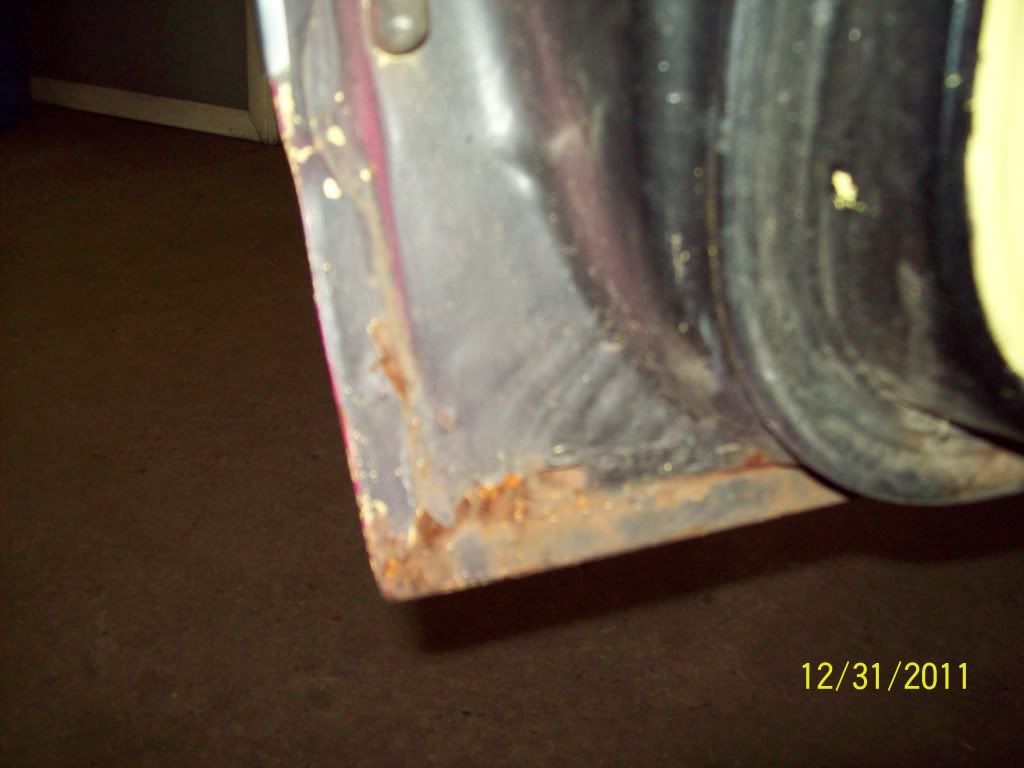
front corner of left door from craigslist
Image
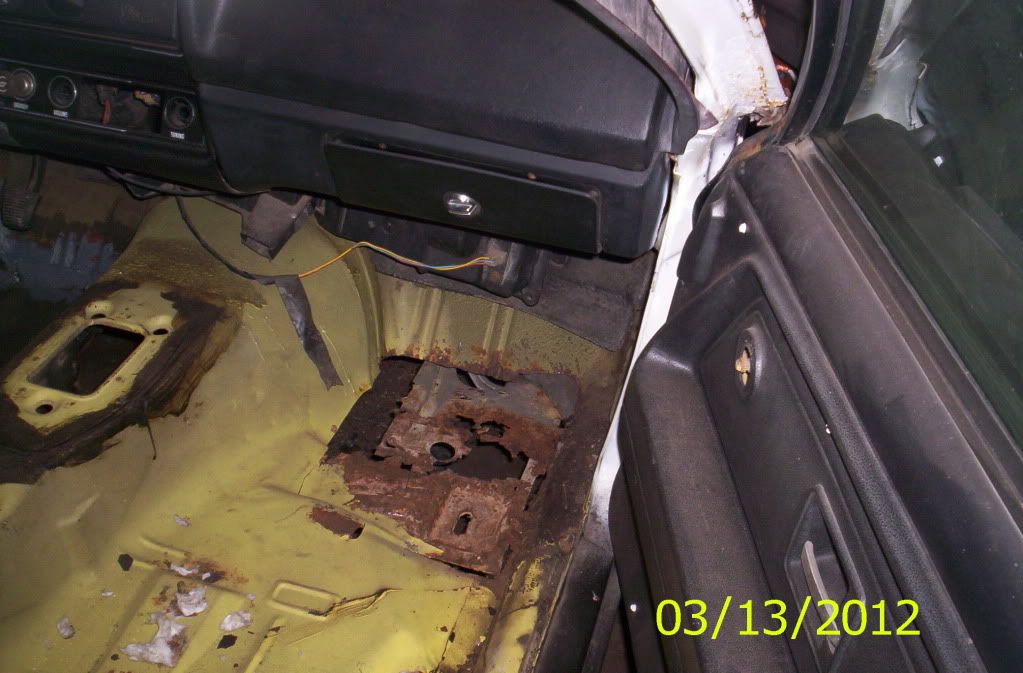
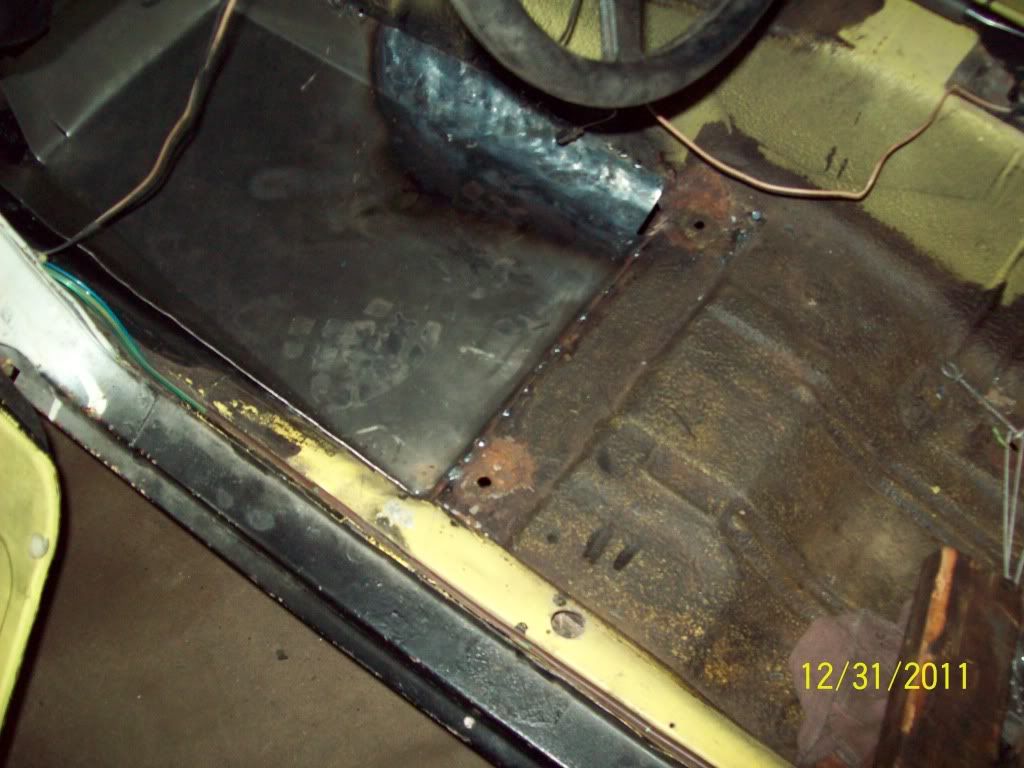
drivers side floor, i used this piece of 18 ga. to see what exact shape i need to make it for a better fit, so now i need to tear it out and make a proper piece.
Image
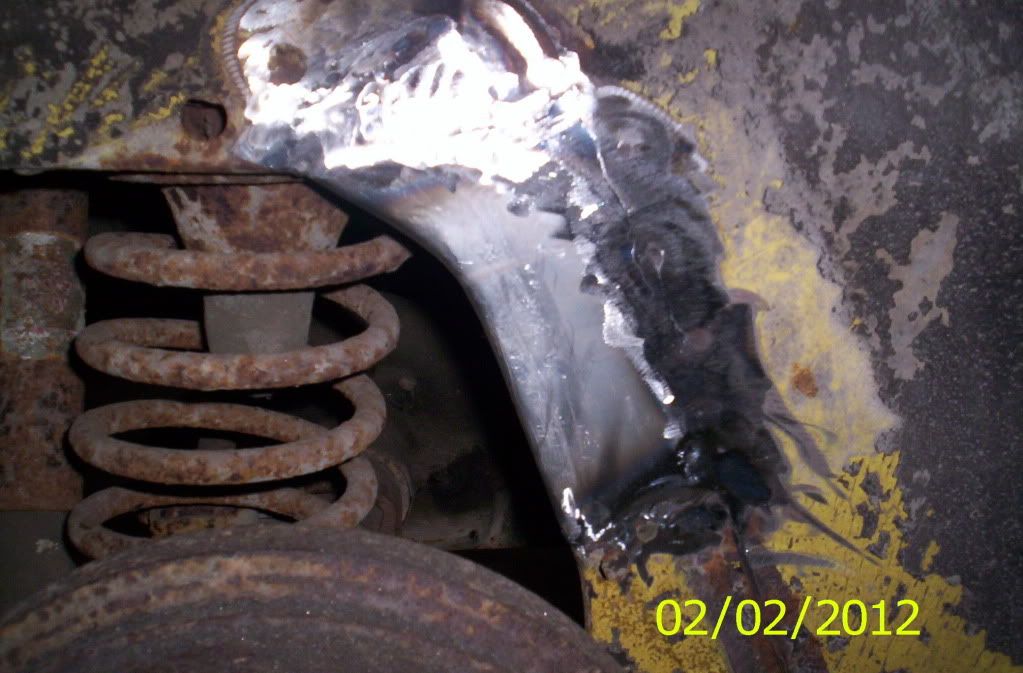
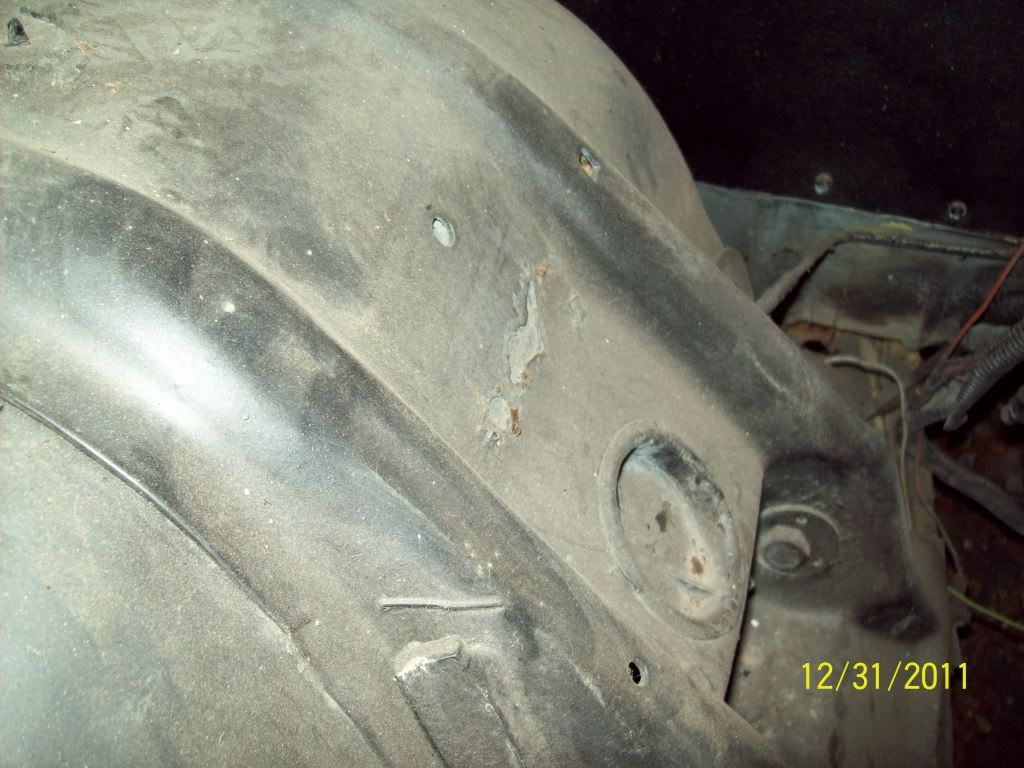
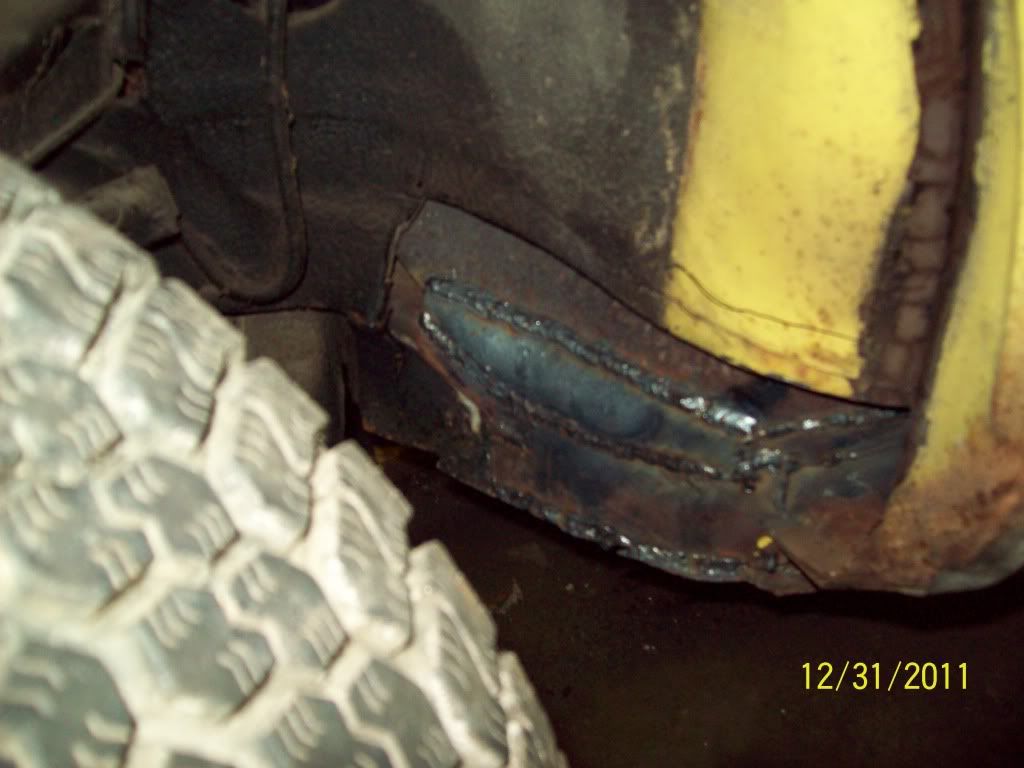
The left front inner wheel well, I noticed rot in that area from the inside of the car when cutting the roted floor out, so i had to cut it on the out side to get in there to patch the rotted frame rail.
Image
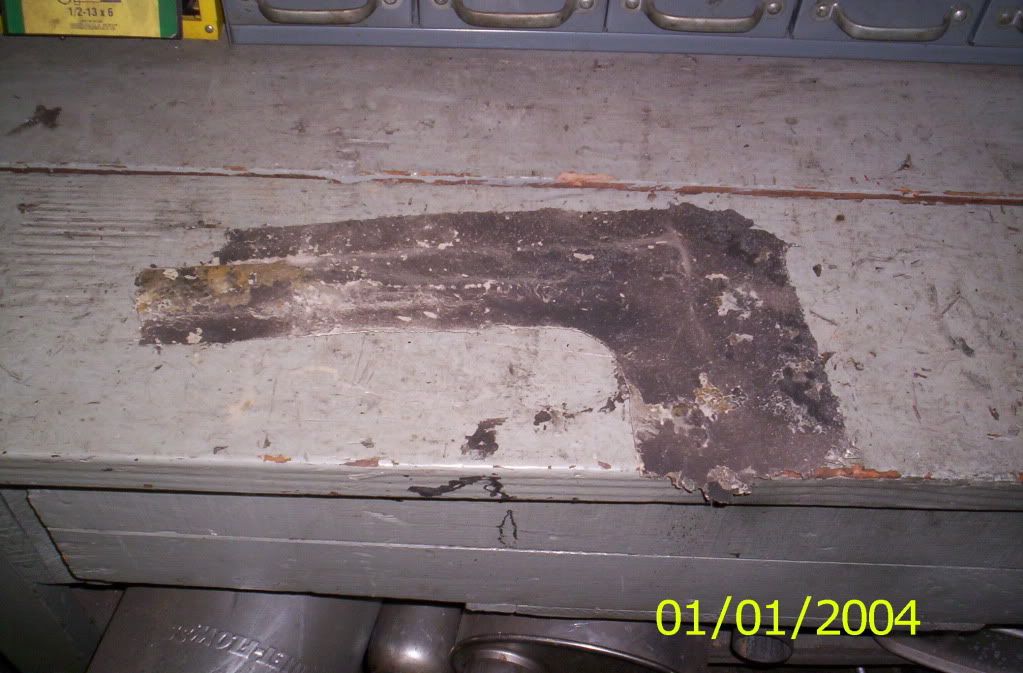
More fiberglass covering rot(left side), i need to knock it all out and patch it correctly
Image
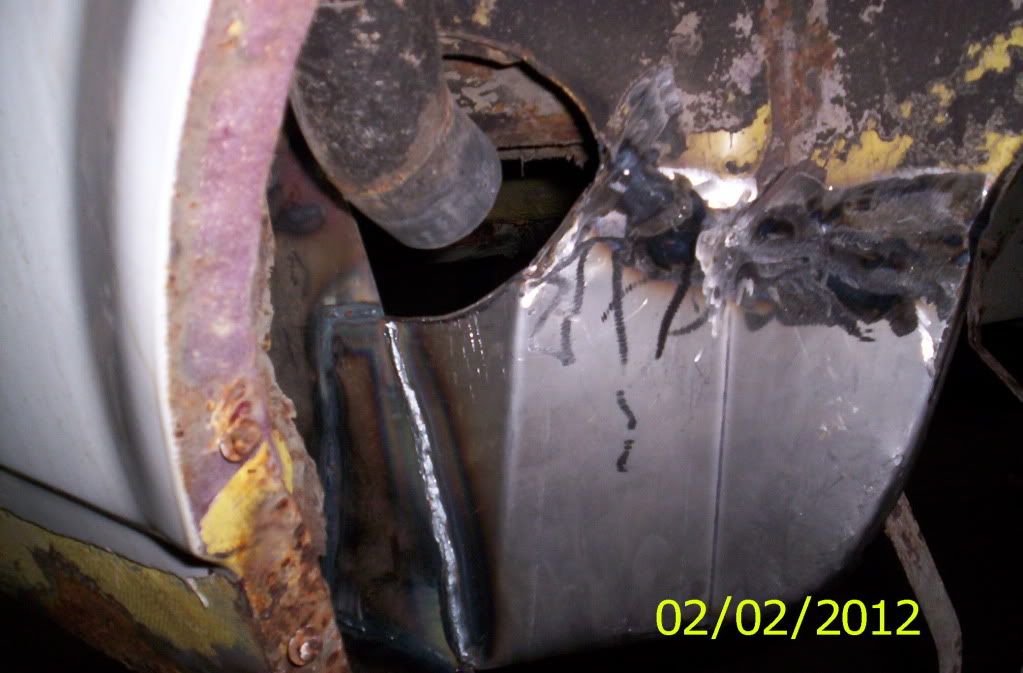
Left rear inner wheel well
Image
Left rear quarter panel, U may notice the lip is way to wide,(which means more bondo/fiberglass to knock out and repair correctly
Image
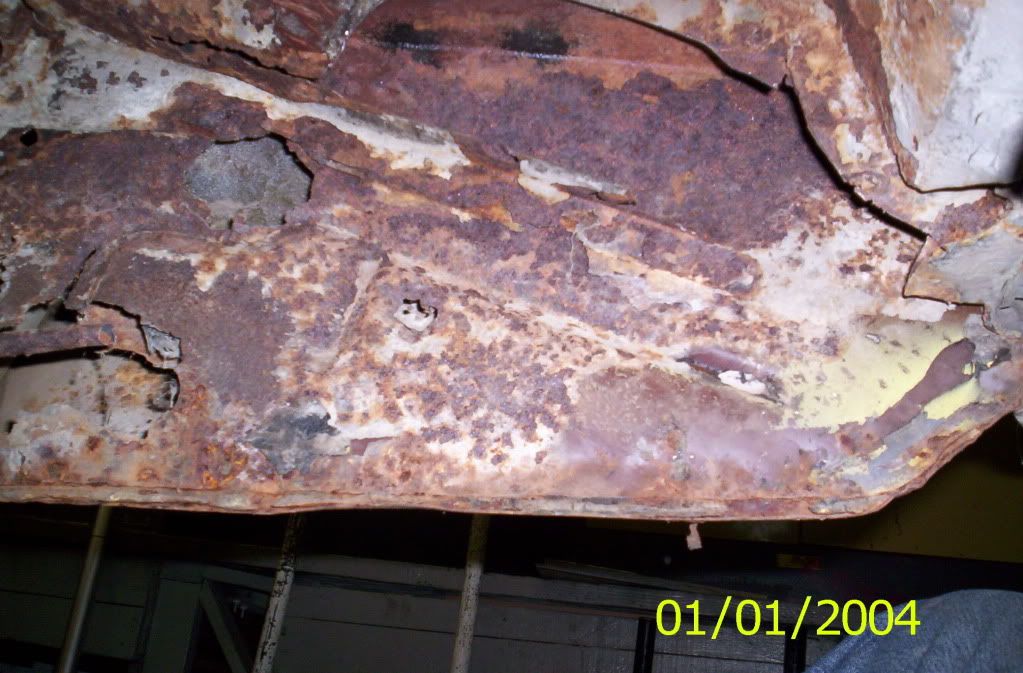
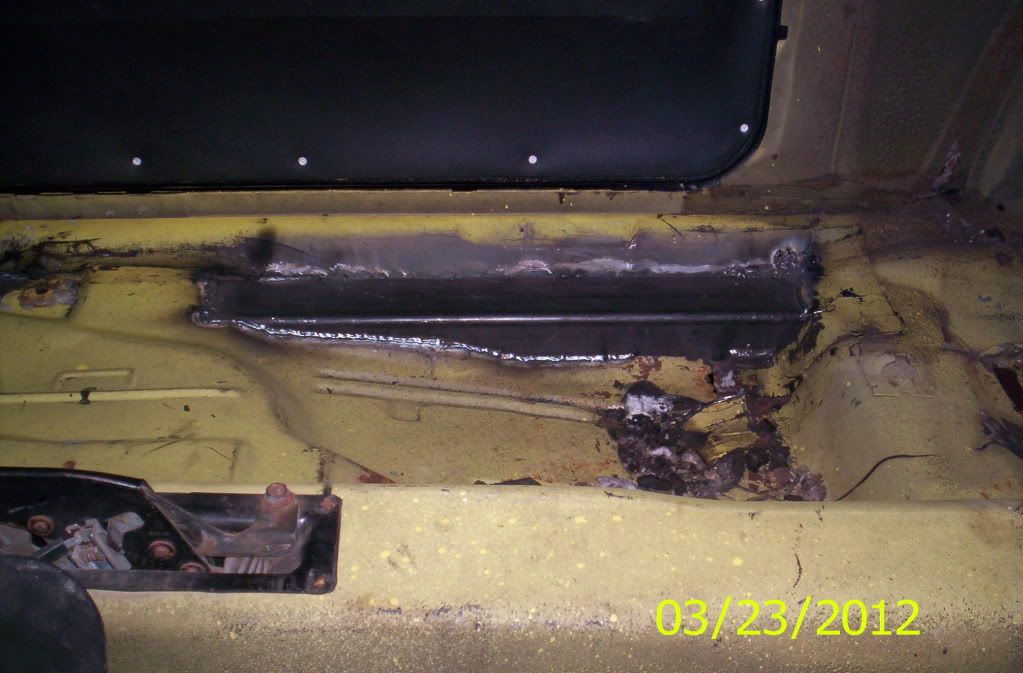
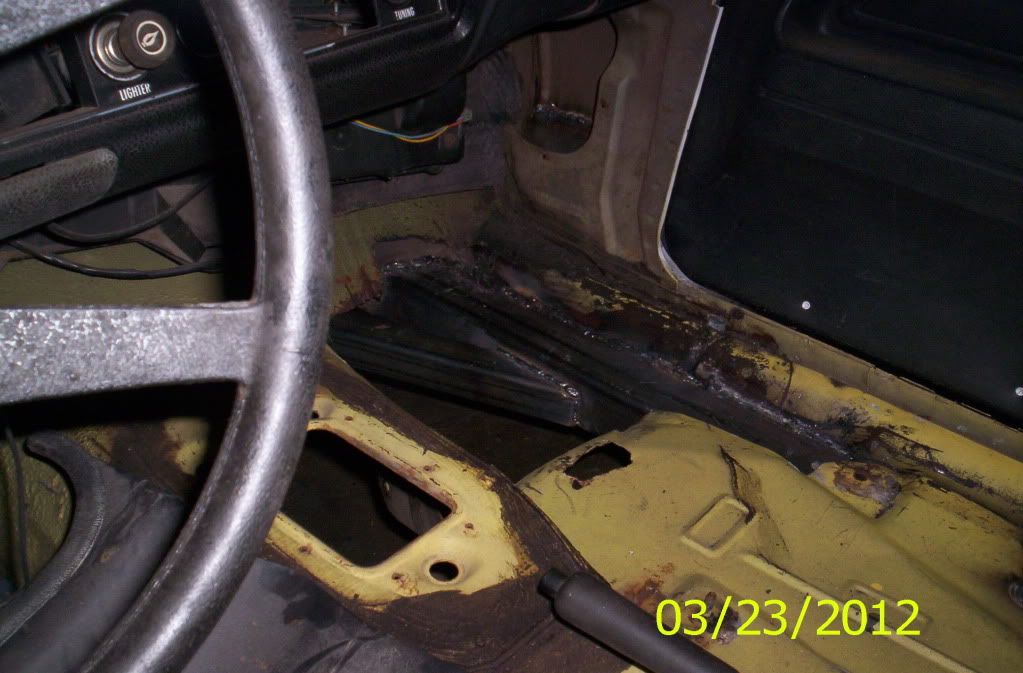
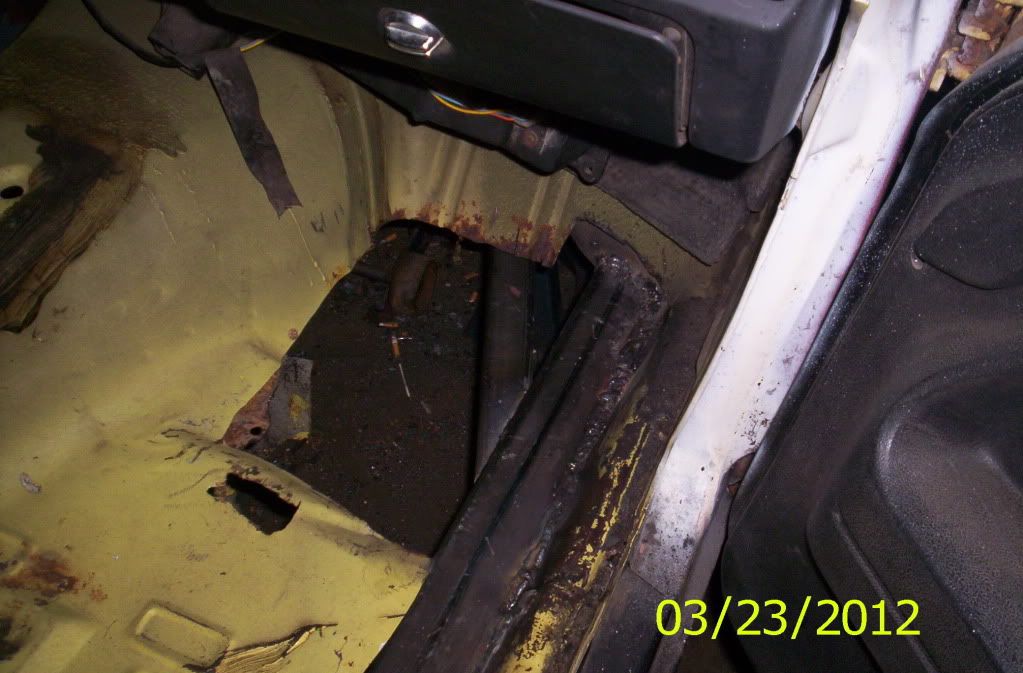
Right side floor, much better shape than the drivers side was, atleast the lca brace actually reaches the trans are like it is supposed to, but i got to cut it all out any way as you can see to fix it properly.
Image
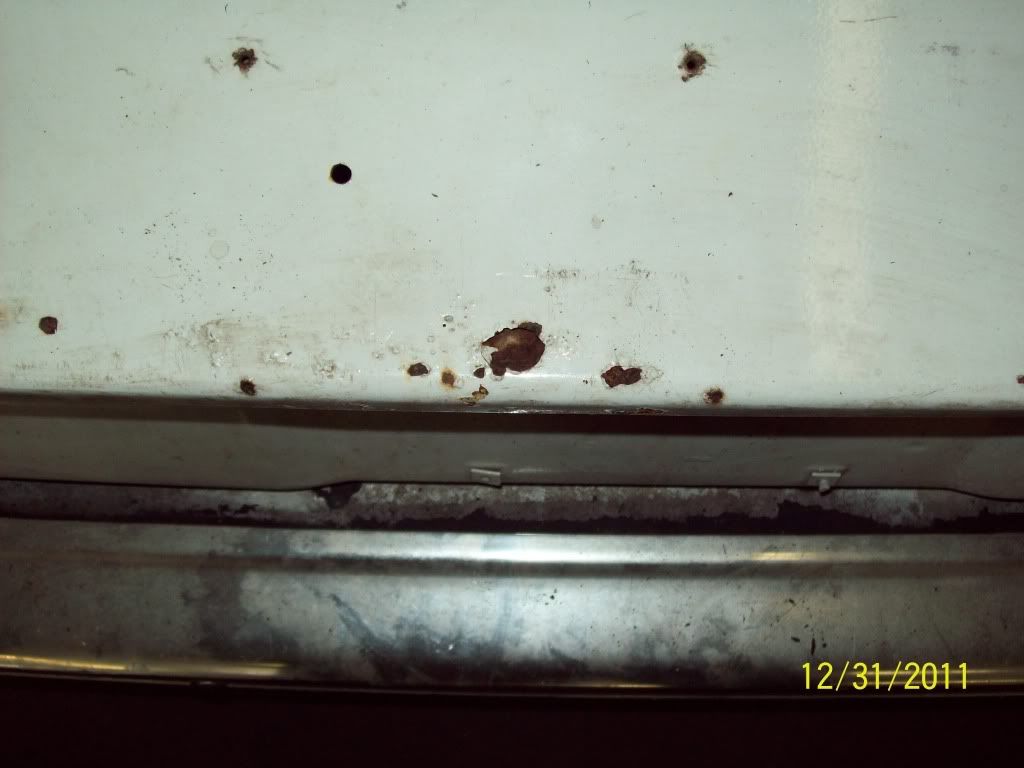
Right side floor under rear seat, small rot hole, It's like this on both sides
Image
Right side behind fender. More fiberglass :(
Image
More rot on the rear hatch(easy fix)
Image
Rear spoiler off of my old 74 gt that i also had stored in the barn with the l88 hood
Image
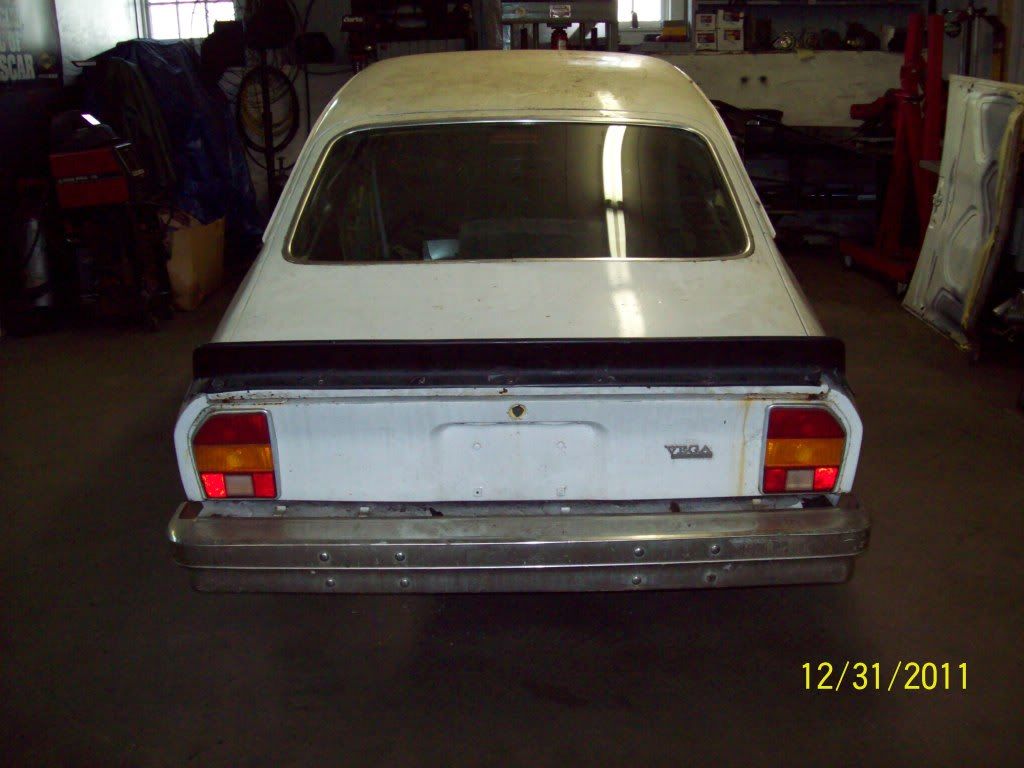
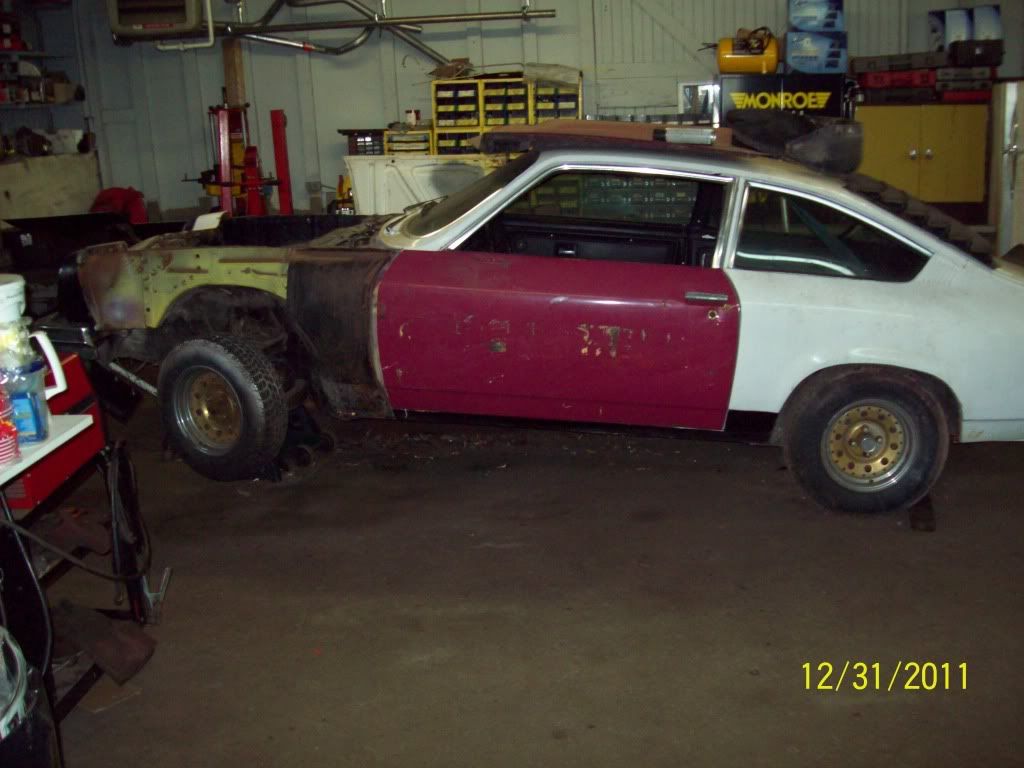
The whole car as i bought it, except for the door and hood. (the hood i had stored in my barn rafters for over 15yrs.) and no the louvers are not correct they are from a mustang, i think. My brother in-law that it would be funny to put them on there.
Image

Thanks, David.
Last edited by 76Vega on Sat May 19, 2012 2:17 pm, edited 3 times in total.
David
1972 Vega GT
User avatar
76Vega
 
Posts: 173
Joined: Wed Dec 21, 2011 7:29 am
Location: Allentown, Pennsylvania

1976 Chevrolet Vega


Re: My $200.00 76 Vega build

Postby 427VEGA » Sun Jan 01, 2012 7:49 pm

Looks like a good project,it will keep you busy for a couple days. :D
User avatar
427VEGA
 
Posts: 67
Joined: Thu Dec 08, 2011 5:19 pm

Re: My $200.00 76 Vega build

Postby chevy art » Sun Jan 01, 2012 8:25 pm

nice to see that ytou are going to bring this old car back to life. dont hesitate to get advice on this forum. this is the place art
chevy art
 
Posts: 1124
Joined: Fri Feb 26, 2010 11:33 pm

Re: My $200.00 76 Vega build

Postby VegaGT » Sun Jan 01, 2012 9:41 pm

That LCA is a little scary! Looks like nothing that can't be fixed with time and patience. :th:
Chris
Looking for a good one...
User avatar
VegaGT
 
Posts: 93
Joined: Tue Nov 22, 2011 10:40 pm
Location: Cedar Springs, Michigan

Re: My $200.00 76 Vega build

Postby 76Vega » Wed Feb 01, 2012 3:27 am

I finished fixing the front end rust, battery tray area, headlight area, charcoal canister area, left Lca support, left frame support, left floor pan, both sides of outer firewall, I still need to finish the right lower lca support and floor pan.
So i decided to move on to the rear of the car for now and lets just say "i have no idea whats holding the car together" I see rust everywhere I started on the passenger side rear and found a bout 1000 pounds of fiberglass both on the outside of the car and under the car in the lca supports and inside both wheel wells,as i am not a fabricator by any means i need some advice on inner wheel well area and the lca support area.

Also i made what i think was a good trade, i traded my L88 hood for several interior pieces that i was missing, a good gt dash (with a wiring harness), both lower control arms (which i desperately needed, see above pics).
and i'd like to thank Millwillcos for the v8 frame plates, and excellent condition hood and fender.

I need some advice on how to go about fixing my rear inner wheel wells and lower control arm supports, I remember seeing some folks fixes on here but now i am unable to find them, I was wonder what size or gauge metals should i go with in these certain area, as pretty much every area on the car is 3 layers of metal, I will take some pictures of what I'm talking about today and will post them tonight.
David
1972 Vega GT
User avatar
76Vega
 
Posts: 173
Joined: Wed Dec 21, 2011 7:29 am
Location: Allentown, Pennsylvania

1976 Chevrolet Vega

Re: My $200.00 76 Vega build

Postby NVEGAR8D » Wed Feb 01, 2012 12:46 pm

Hi,
you may want to check out the project journals to get a lot of ideas like i did.
nick75vega
User avatar
NVEGAR8D
 
Posts: 778
Joined: Thu Oct 21, 2010 12:20 am
Location: Orangeville/On, Canada

1975 Chevrolet Vega Hatchback

Re: My $200.00 76 Vega build

Postby Kenova » Wed Feb 01, 2012 2:55 pm

Keep in mind that just about all of the sheet metal is load bearing and structural.
If the inner wheel wells need replacing you could look into adapting fender/wheel housings meant for trailers. Get something big enough to cover the same area as the originals and use the heaviest gauge you can get.
If both the inner wheel wells and lower control arm mounts need replacing, you have the perfect excuse to mini-tub the rear. :th:

Ken
Last edited by Kenova on Wed Feb 01, 2012 10:26 pm, edited 1 time in total.
My other car is a Nova.
User avatar
Kenova
 
Posts: 1641
Joined: Sun Jul 02, 2006 9:46 pm
Location: Ontario, Canada

Re: My $200.00 76 Vega build

Postby 76Vega » Wed Feb 01, 2012 8:26 pm

Here are the pictures i said i would post and i was thinking of tubbing it but i really don't have the extra money, so I'm going to do the repair as close to original as possible.(ignore the date's on the pic's i was to lazy to set it.)
Please remember all this was covered in fiberglass and some was hard to find till i started hitting around with the chipping hammer.

Right rear wheel well frame support
Image

right rear wheel well back
Image

right inner panel beside gas tank
Image

right rear inner wheel well front.
Image

Right rear lower control arm mounting bracket
Image

Left rear lower control arm bracket (sorry for the close up i was laying on my back)
Image

Left rear wheel well, No where near as bad as the right side.
Image
David
1972 Vega GT
User avatar
76Vega
 
Posts: 173
Joined: Wed Dec 21, 2011 7:29 am
Location: Allentown, Pennsylvania

1976 Chevrolet Vega

Re: My $200.00 76 Vega build

Postby 76Vega » Wed Feb 01, 2012 8:36 pm

Here are some more pics of what i have got done in the 2hrs i actually got to work on it today.

Lets start out with a good one, Here is a picture of the fiberglass that was covering the rotted frame on right side.
Image

These following pics are what i have cut out so far and yes if you see me making a mistake PLEASE, let me know what i am doing wrong and what i can do differently.
Image

You can see in this pic where i had already replaced the inside beside the gas tank, was 2 layers both rotted not counting the quarter panel.
Image

Image
David
1972 Vega GT
User avatar
76Vega
 
Posts: 173
Joined: Wed Dec 21, 2011 7:29 am
Location: Allentown, Pennsylvania

1976 Chevrolet Vega

Re: My $200.00 76 Vega build

Postby 76Vega » Wed Feb 01, 2012 8:53 pm

Here is where i have a question i hope someone can answer.
In this picture you can see the rot on the outside of the lca bracket
Image
What i was thinking of doing is cutting the rust out above the bolt hole and replace it with 8th inch steel (out lined in red) than grinding that down and covering the whole outside as far back behind the rocker as i can with more 8th inch steel (outlined in blue).
Will 8th inch steel be strong enough?
I have some quarter inch steel but it's way to thick.
David
1972 Vega GT
User avatar
76Vega
 
Posts: 173
Joined: Wed Dec 21, 2011 7:29 am
Location: Allentown, Pennsylvania

1976 Chevrolet Vega

Re: My $200.00 76 Vega build

Postby gerbsinmd » Thu Feb 02, 2012 9:58 am

If my memory serves me correctly that is what someone else has done, BUT, then they took some 2x3 and welded it to the pinch seam and then welded it the metal you are replacing. I think that was Nick and someone else that did very similar things.
1999 Saturn SL2
2017 Cruze Hatchback
2008 Town & Country - Family transport
2018 Cruze - 35mpg - avg, 49.7mpg - best so far.
2011 Impala - commuter
RIP-2002 Saturn SL2 Commuter car - burned a valve @ 234k miles

1977 Monza Mirage being Restified!!
User avatar
gerbsinmd
 
Posts: 2062
Joined: Mon Jun 26, 2006 2:48 pm
Location: Dunkirk, MD

1977 Chevrolet Monza Mirage

Re: My $200.00 76 Vega build

Postby 76Vega » Thu Feb 02, 2012 7:16 pm

Here is what i got done today i only got to spend about 2hrs on it, i still have to tackle the lca bracket and the frame strip.
'

I think thats how i will go about the lca bracket.

I used 18 gauge as it was slightly heavier than the original metal.
Image

I need to finish grinding down the rest of the welds. I had to put the wheels back on and move it out of the garage so we could put a customer cars in it's spot(hopefully it won't be outside to long as i had taken out the windshield to fix some small rust areas on the dash.
Image
David
1972 Vega GT
User avatar
76Vega
 
Posts: 173
Joined: Wed Dec 21, 2011 7:29 am
Location: Allentown, Pennsylvania

1976 Chevrolet Vega

Re: My $200.00 76 Vega build

Postby MonzterMtrSprt » Wed Feb 08, 2012 1:45 pm

looks good man! remember what johnny cash said one piece at a time ;)
Check out my 79 Monza Build thread
viewtopic.php?t=36350
User avatar
MonzterMtrSprt
 
Posts: 10
Joined: Wed Feb 08, 2012 12:10 pm
Location: Quad Cities, IA/IL

Re: My $200.00 76 Vega build

Postby oreokookie » Wed Feb 08, 2012 10:13 pm

Well, I can see you got it going on with the mig welder and steel....after lookin at those last pics, I see your talented enought to finish the uni- body....i would say that the rest of the vehicle is gonna proceed just like you started it, but would use heavier steel on structural parts like the leaf spring areas, and frame.......I would like to see you really customise this vega, and not just copy detroit like most guys out there.......and , Yes, exactcly, in 20 years you'll never find a Vega for $200..trust me i was a teen when all these smaller unibodys came out, I watched them dissappear.....same with quality rock music!!!...keep on cuttin, keep on torchin!....the oreo
oreokookie
 
Posts: 4
Joined: Wed Feb 08, 2012 10:07 pm

Re: My $200.00 76 Vega build

Postby 76Vega » Sat Mar 24, 2012 4:21 pm

It's been awhile since i've been able to actually work on the vega so here is a bit of what i got done so far.

Finally got the 5 lug conversion done, Temp wheels for now.
Image

steel i ordered for the frame rails.I ordered 3"X3" i know it will stick up through the floor that doesn't bother me
I was going to go with 2X3 but then i could only butt it into the bottom of the front frame instead of what i was able to with
the 3X3 which let me go up the side of the frame a 1"and a half, I just feel it is stronger this way.
Image

floor before i started
Image

shots of frame rail (passenger side), don't mind the welds there was 3 of us welding on it 2 migs and 1 stick welder.
Image
Image
Image

shots of the new lca support compared to the left side
I used 2X2" 3/16th steel and ran it back into the 3X3 frame.(obviously alot better than the factory),
I know you cannot see it in the pictures but i did cut it out to make the lca rear bolt accessable(but only through the top without and exhaust on. :)
Image
Image
Image
David
1972 Vega GT
User avatar
76Vega
 
Posts: 173
Joined: Wed Dec 21, 2011 7:29 am
Location: Allentown, Pennsylvania

1976 Chevrolet Vega

Next

Return to Project Journals

Who is online

Users browsing this forum: No registered users and 23 guests