76 Wagon Project

Tell everyone about the progress of your project! Please respect people's threads.

Moderator: Moderators

Re: 76 Wagon Project

Postby 76wagon » Tue Mar 04, 2014 8:17 pm

Got some more work done over the weekend. Front end is just about done, still needs a little tweaking with the bumper mounts and some prettying up but it's not looking too bad

Here's the headlight mounts all welded up. Need headlight adjusters to put in the lights but they seem to line up nicely
Image

Here's the car with the front end all put together. Almost looks like a car again
Image

Next step was the rear bumper. What I'm doing for mounts is to fab up new body side mounts and weld them to the '72 bumper mounts. Here's one tacked together

Image

Here's the rear bumper on with all the mounts just tacked up. Gonna get it outside to make sure it looks right before I finish weld anything
http://i562.photobucket.com/albums/ss63 ... xuau3d.jpg

To finish up the rear end I'm planning on leaving the license plate in the hatch and getting rid of the contour in the bumper that went around the stock license plate location. Then on to making up a steel rear valance. gonna be a pain but easier than finding both halves of the original and getting rid of the license plate in the middle...
Last edited by 76wagon on Tue Oct 14, 2014 10:14 am, edited 4 times in total.
User avatar
76wagon
 
Posts: 375
Joined: Tue Mar 06, 2012 2:54 pm
Location: Kitchener, Ontario


Re: 76 Wagon Project

Postby waybad » Tue Mar 04, 2014 8:31 pm

:th: :th: :th: :th: :th: :th:
Tinker
User avatar
waybad
 
Posts: 1794
Joined: Sun Feb 24, 2008 12:03 am

Re: 76 Wagon Project

Postby zeke » Wed Mar 05, 2014 10:24 am

Nice work, good deal on the aluminum slots. 8)
Chris

zeke's 79 Monza Project

zeke's 78 Sport Coupe

Photographs posted by this user (zeke) are the sole property of this poster. Any use without express written permission is prohibited
User avatar
zeke
 
Posts: 2930
Joined: Fri Jul 21, 2006 3:27 am
Location: Southern Ontario, Canada

1979 Chevrolet Monza 2+2

Re: 76 Wagon Project

Postby vegastre » Wed Mar 05, 2014 1:41 pm

To finish up the rear end I'm planning on leaving the license plate in the hatch


beentheredonethat :)

You will have the bumper relief for the license plate to deal with. I used a rear middle trunk light from a 2000 Impala if I remember correctly. Ya, build your rear valance out of metal as fiberglasing the two halves together was a big pain.
You do not have the required permissions to view the files attached to this post.
Phil Kennedy~
72 Chevrolet Vega GT Hatchback
75 Pontiac Astre SJ Safari Wagon
User avatar
vegastre
 
Posts: 1289
Joined: Mon Nov 10, 2008 12:10 am
Location: Dallas, Texas

1975 Pontiac Astre SJ

Re: 76 Wagon Project

Postby 76wagon » Wed Mar 05, 2014 8:09 pm

I was thinking I'd cut up my worst rear bumper to get pieces to slice into where the plate was. I think this would look best but I'd have to get it chromed and that's not cheap. Another option I've been thinking of is to somehow incorporate that relief into the valance panel. Leaves the bumper stock but might be hard to make it look right. Still might go with the 3rd brake light idea too, looks good and I really don't want to get rear ended. Might be next week before I get a chance to work on it so I'll have time to think about it....

Phill
User avatar
76wagon
 
Posts: 375
Joined: Tue Mar 06, 2012 2:54 pm
Location: Kitchener, Ontario

Re: 76 Wagon Project

Postby vegastre » Thu Mar 06, 2014 2:56 pm

I'd have to get it chromed and that's not cheap.


Ya,
The Bumper shop I use quoted me $300 to piece and chrome it. Its a show chrome shop. I came up with the idea of a bumper light as an alternative and really didn't think I would like it but had the opposite effect. I liked it almost as soon as I installed it. The light housing and lens $8 bucks and a light kit from JC Whitney $6 was not the deciding factor because I had the third light idea before I got the bumper shop quote. Obviously it looks pieced in to Vega owners but I have had some positive comments at cruise's. Good job so far, I'm Looking forward to see how you do the lower back valence and bumper as well.
Phil Kennedy~
72 Chevrolet Vega GT Hatchback
75 Pontiac Astre SJ Safari Wagon
User avatar
vegastre
 
Posts: 1289
Joined: Mon Nov 10, 2008 12:10 am
Location: Dallas, Texas

1975 Pontiac Astre SJ

Re: 76 Wagon Project

Postby 76wagon » Thu Mar 06, 2014 6:17 pm

Hmmm $300 is way cheaper than I was thinking, it'll be worth it to at least check out. I'm planning on going with the split front bumper and those bumper halves really look unfinished up close, I know it would drive me nuts once the body and paint was all done. Worst part is my dad works at a chrome plater and they don't do custom work anymore :(

Phill
User avatar
76wagon
 
Posts: 375
Joined: Tue Mar 06, 2012 2:54 pm
Location: Kitchener, Ontario

Re: 76 Wagon Project

Postby Vega45 » Thu Mar 06, 2014 10:23 pm

Hi Phill
there is a ad on Kijiji they say the cam chrome any thing here is the ad number and other info

Ad ID 563414795
928 Queenston Road, Hamilton, ON L8G, Canada
289-775-0963
User avatar
Vega45
 
Posts: 304
Joined: Fri Oct 09, 2009 8:23 pm
Location: Hamilton Ontario Canada

Re: 76 Wagon Project

Postby vegastre » Fri Mar 07, 2014 1:37 am

Hmmm $300 is way cheaper than I was thinking


Ya,
My buddy had them do his '72 split bumpers that were squared off. He had them piece in the rounded corners he supplied. $450 for the pair and they looked really sharp. I have noticed down through the years chrome shops are cheaper on some stuff and way over priced on little items. You certainly have fab skills but most show chrome bumper shops prefer to do the patch work in house themselves.
Phil Kennedy~
72 Chevrolet Vega GT Hatchback
75 Pontiac Astre SJ Safari Wagon
User avatar
vegastre
 
Posts: 1289
Joined: Mon Nov 10, 2008 12:10 am
Location: Dallas, Texas

1975 Pontiac Astre SJ

Re: 76 Wagon Project

Postby 1100kaw2 » Fri Mar 07, 2014 11:58 pm

Like the way this is going.
Nice front clip job.
Why not just shave the lic plate from tailgate?
Clean up gate and mount tag lower like early model.
Just a little body work, which your obviously not afraid of, and no big dollar mods and re chroming.
Jus my 2 cents
I like
Darrell
Darrell


72 LS-5spd.
viewtopic.php?f=20&t=33788
User avatar
1100kaw2
 
Posts: 253
Joined: Mon Jun 24, 2013 8:06 pm
Location: South West ,Ohio

Re: 76 Wagon Project

Postby 76wagon » Mon Mar 10, 2014 3:16 pm

I had thought of shaving the license plate mount on the hatch and moving it under the bumper but I like the look of it better in the hatch. I think the hatch looks a little plain without the plate in it.

Maybe Ill look at some pictures and convince myself I like it better under the bumper..

Phill
User avatar
76wagon
 
Posts: 375
Joined: Tue Mar 06, 2012 2:54 pm
Location: Kitchener, Ontario

Re: 76 Wagon Project

Postby 76wagon » Fri Mar 21, 2014 7:40 pm

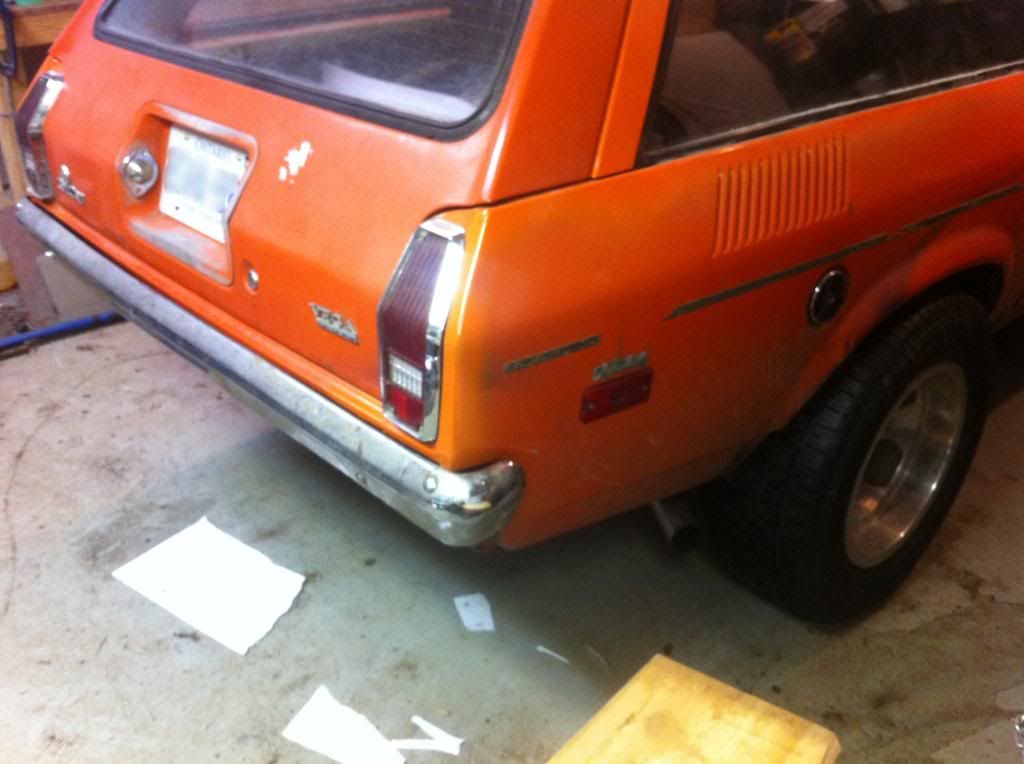
Update time. Got the rear bumper mounts all welded up and looks pretty good. Started to modify a rear license plate bracket to fit without having to cut up the spare tire well but got sidetracked...

Ever since I put the car back together the front passenger side tire was about 1/2" too far back in the wheelwell. Actually had to build up the bump stop with weld to get the mechanic to write up a safety, since the tire would rub if I turned too far. I decided I should probably fix that first since it 's a bit more important than the rear bumper valance.

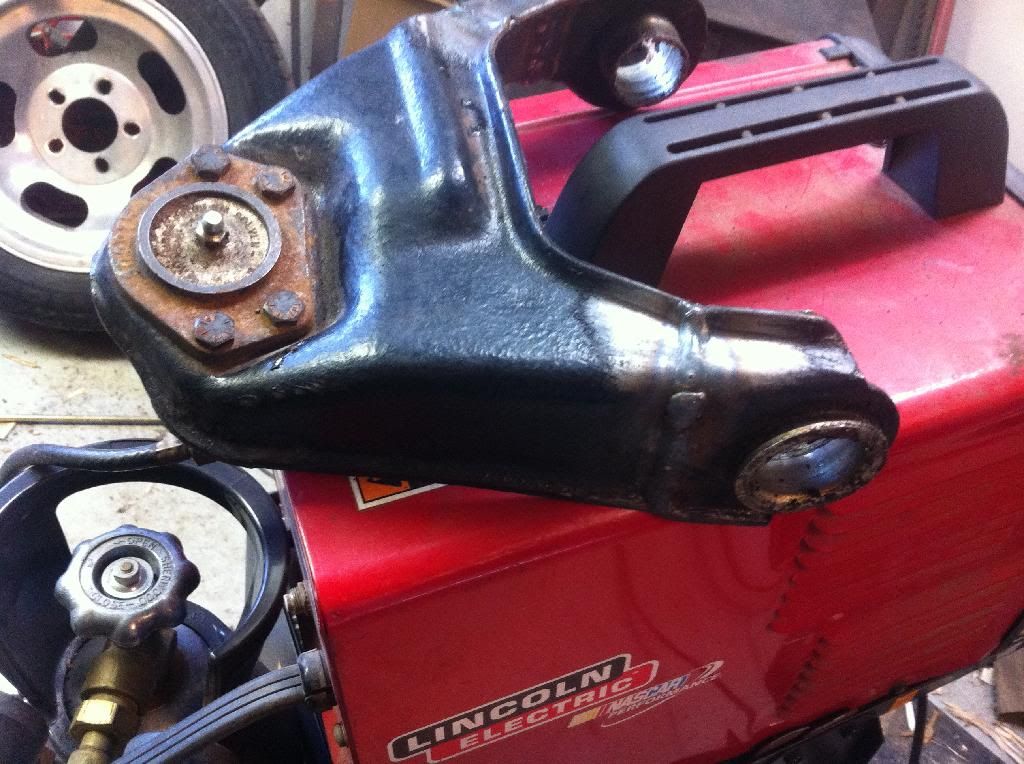
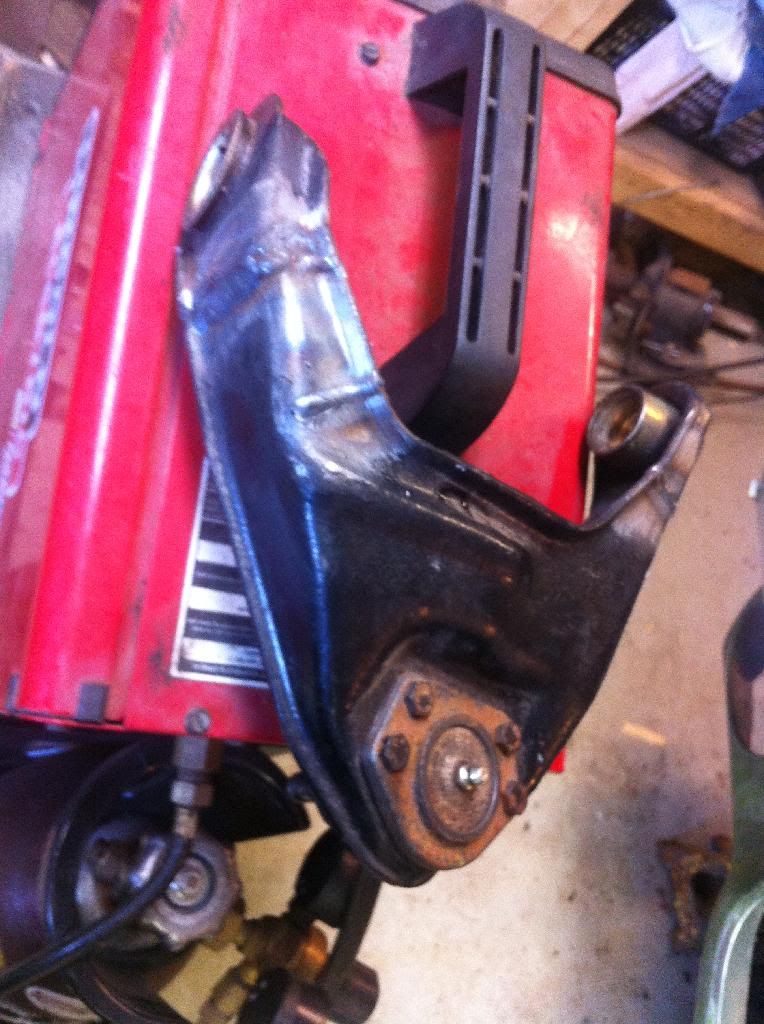
After some measuring I found the upper ball joint sat 1/2" further back than the driver's side ball joint, meaning it wasn't just the lower control arm adjustment that caused it. What I did to remedy this was cut the control arm into 3 pieces, then shorten the front side by 1/4" and add that material to the rear side of the control arm.

Here's a couple shots of the control arm welded up

Image

Image

Got a couple coats of paint on it and bolted it back in. Ended up needing to 'adjust' the bump stop / spring pocket brace mount with the torch and the hammer since the spindle was touching there with the suspension unloaded. Sorry no pics of that.

Next I got the wheels on and the front up on ramps. Did some comparative measuring side to side and got the lower ball joint pretty close to where driver's side is. I'm pretty close to the end of my adjustment but think they'll have enough when I take it in for an alignment this spring. If not I'll have to do the same to the lower control arms which I REALLY don't want to do.

Now the car is back on the ground and the fender is back on, the wheel in question turns without rubbing. Success! Gonna cut the bump stops off and take the car around the block to see if there's any rubbing in the front. By the looks of it I should be in the clear. Then it's on to flaring out the rear wheelwells to fit my tires, the fun never stops...

Phill
User avatar
76wagon
 
Posts: 375
Joined: Tue Mar 06, 2012 2:54 pm
Location: Kitchener, Ontario

Re: 76 Wagon Project

Postby 76wagon » Thu May 22, 2014 7:40 pm

Got busy and the car got stached in the garage and forgotten about for a couple months but I'm back on it now. I've gotten the hood modded for the bolt on hinges I've been saving for close to 10 years, really makes lining up the hood easy. The gaps still look a little wide to me(by about 1/8") but that's nothing some welding and patience won't fix.

My latest little project is flaring out the rear wheelwells. So far I've cut around the wheel openings and brought them out a bit. I started at 1-1/2" but thought it looked like a bit much. Today I brought them back to 1" out and it looks better to me.

Here they are at 1-1/2"

Image

Image


And here they are brought back to 1". That covers the tire but doesn't look too crazy. Pictures aren't the greatest but I'm open to suggestions on how far to flare them out.

Image

Image


Next step is to fill in the gap in the inner wheelwell with some steel. Then I get to do the really fun stuff on the outside- Don't warp that panel! :shock:

Then I get to take the electric pump out of the tank and replace all the fuel lines with 3/8" (should have looked into that before I redid the stock 5/16" line- oh well) that should be enough to get this thing on the road a bit so I can work out the bugs before body work fun begins....


Phill
User avatar
76wagon
 
Posts: 375
Joined: Tue Mar 06, 2012 2:54 pm
Location: Kitchener, Ontario

Re: 76 Wagon Project

Postby Monza Harry » Thu May 22, 2014 10:01 pm

Phill I agree 1" looks more natural (better in my taste) than the bigger flare. Pretty ingenious thinking there Phill, by re-using the factory lip you cut your fab time in half, and double or tripled your chances of a clean matching lips, here I was thinking you were going to build them from scratch, I've helped my friend scrap a bunch of sheet metal, uuuhm, I mean build some for his stock car, It looks a lot easier than it is and I expected lots of difficulty! Harry :th:
I'm not a hoarder I'm a preservationist 78 Monza Spyder (~Soon(ish +/- I guess) To Be 2+2 with Spoilers)
User avatar
Monza Harry
 
Posts: 2568
Joined: Tue Oct 04, 2011 8:50 am
Location: Windsor ON Canada

1978 Chevrolet Monza 2+2

Re: 76 Wagon Project

Postby badtoad454 » Thu May 22, 2014 10:43 pm

I did that once on a Sonoma I built, just like your going to do. IF I had it to do again, I would use one piece of metal and curve it to match the lip and body, weld slow and take my time , days if necessary. Otherwise youll end up with a bunch of filler and time trying to make it look good. I don't recommend using more that 2 pieces to do that flair.
Gona need a bigger Hammer!
User avatar
badtoad454
 
Posts: 42
Joined: Tue Oct 01, 2013 9:20 pm
Location: Elkhart , Indiana

1975 Pontiac Astre Safari Wagon

PreviousNext

Return to Project Journals

Who is online

Users browsing this forum: No registered users and 6 guests