76 Wagon Project

Tell everyone about the progress of your project! Please respect people's threads.

Moderator: Moderators

Re: 76 Wagon Project

Postby 76wagon » Tue Oct 14, 2014 12:54 pm

Got some work done on the car over the weekend. Rad is in and fan is mounted and hooked up. Ended up needing a different thermostat housing so now I have to wait for Summit to get it running, figure I should have everything by this Friday. Forum's giving me errors when I try to post pics so I'll have to add them later....

Got the rad back Friday from the welder and it looks awesome, really handy knowing people who can do work like this

Image


Next up were the fan mounts. They're bent out of 16 ga aluminum and rivet to the rad. The lower also has the rad mounts built into it.

Image

Image
Last edited by 76wagon on Wed Feb 18, 2015 9:22 pm, edited 2 times in total.
User avatar
76wagon
 
Posts: 375
Joined: Tue Mar 06, 2012 2:54 pm
Location: Kitchener, Ontario


Re: 76 Wagon Project

Postby 76wagon » Tue Oct 14, 2014 3:05 pm

Here they are mounted, went on really nice and look really slick in the car.

Image


And with the fan shroud mounted. WAY nicer than my old setup and should move way more air as well.

Image

Image


I didn't get any of the rad installed but I'll try and get some tonight.

Phill
User avatar
76wagon
 
Posts: 375
Joined: Tue Mar 06, 2012 2:54 pm
Location: Kitchener, Ontario

Re: 76 Wagon Project

Postby zeke » Tue Oct 14, 2014 3:11 pm

Summit knows how to treat it's customers. Excellent service!

Lots of fins on those fans! Should pull some air! Looking good Phill.
Chris

zeke's 79 Monza Project

zeke's 78 Sport Coupe

Photographs posted by this user (zeke) are the sole property of this poster. Any use without express written permission is prohibited
User avatar
zeke
 
Posts: 2930
Joined: Fri Jul 21, 2006 3:27 am
Location: Southern Ontario, Canada

1979 Chevrolet Monza 2+2

Re: 76 Wagon Project

Postby 76wagon » Wed Oct 15, 2014 10:21 am

I hooked up one fan and it moves more air than my old 14" pusher. The old fan kept up pretty well on hot days with the old rad. Don't think I'll ever have cooling issues again even with some engine upgrades and A/C running once I get that installed

Phill
User avatar
76wagon
 
Posts: 375
Joined: Tue Mar 06, 2012 2:54 pm
Location: Kitchener, Ontario

Re: 76 Wagon Project

Postby 76wagon » Tue Jan 06, 2015 9:29 pm

Been a while since I've posted an update. Got the rad installed and one fan wired up, the plan is to wire the second fan to a hotter temp switch. Needs a little finishing but everything fits in nicely.

Here's the rad in the car. That adjustable water neck made it super easy, but it leaks a little bit. Some RTV should fix that problem next time everything's apart, I've never had the best luck with o-ring seals on water necks.

Image


My latest project is changing the door hinges to bolt on so I can actually adjust the doors. First I drilled screw holes, then cut the welds and chiseled off the hinges. On the body side I welded in nuts, on the doors I made plates for the inside of the door and welded nuts to them.

Image


Body side partway through

Image


Finished product body side

Image


Driver's door with the hinges off and ready to bolt on. Door was a bit crunched in one spot, don't have a stud welder or proper slide hammer so I improvised...

Image


That's all the pictures for now. I have both doors done like this, next step is to get started on the body work. Hopefully I can have this thing in paint by the end of May, just in time for that show in Ohio!

Phill
User avatar
76wagon
 
Posts: 375
Joined: Tue Mar 06, 2012 2:54 pm
Location: Kitchener, Ontario

Re: 76 Wagon Project

Postby waybad » Wed Jan 07, 2015 8:40 pm

well done!! :th:
Tinker
User avatar
waybad
 
Posts: 1794
Joined: Sun Feb 24, 2008 12:03 am

Re: 76 Wagon Project

Postby 76wagon » Mon Feb 09, 2015 5:32 pm

Time for an update. Got the door hinges all done, needed to grind a bit for bolt head clearance on the body side. Doors are finally lined up but they were both twisted- lined up in the front top and bottom, in the rear they were both in on top and out on the bottom. Twisting them back isn't hard just don't have the room in the garage, have to do it outside.

Over the weekend I finished up the sandblasting on all my panels. Would have had them in primer but the compressor died and had to spend a few hours getting it up and running again. Should be able to get some primer on them soon and get them installed for good

Not much for pics this time but I did manage to get the mounting points figured out for the hood shocks.

Here's the pass side. mounts are just hacked together for now but they'll look all pretty once I'm done.
Image

Here's a closeup of the hinge side. Works great and I don't have to modify the hood at all.
Image


One more- Picked up an Astre grill. Think I might go with it, looks pretty cool. I've never seen a split bumper Astre before (never even seen an Astre)
Image


Phill
User avatar
76wagon
 
Posts: 375
Joined: Tue Mar 06, 2012 2:54 pm
Location: Kitchener, Ontario

Re: 76 Wagon Project

Postby Kenova » Mon Feb 09, 2015 6:29 pm

Take good care of that grill. They are extremely rare.
It's a one-year-only item just for the Canadian market.

Ken
My other car is a Nova.
User avatar
Kenova
 
Posts: 1641
Joined: Sun Jul 02, 2006 9:46 pm
Location: Ontario, Canada

Re: 76 Wagon Project

Postby Vega45 » Mon Feb 09, 2015 9:10 pm

I like the hinge ....... But i got to say the Vega grill is a way better Grill......Like Ken said the grill is RARE .Looking forward to seeing it completed so all of us Southern Ontario Vega guys can meet up together at a show.


Terry
User avatar
Vega45
 
Posts: 304
Joined: Fri Oct 09, 2009 8:23 pm
Location: Hamilton Ontario Canada

Re: 76 Wagon Project

Postby 76wagon » Tue Feb 10, 2015 7:07 pm

I knew the grill was a rare Canadian only part but didn't know it was one year only! I'll probably paint it and the Vega grill and see which one I like better. My original plan was to maybe trade it for something but it started to grow on me once I put it on to look at it. It's tucked away all safe and sound with my other parts while I do the body work- I'd hate to wreck it without even using it.

Thanks Terry. My goal is to have it on the road for June, really wanna get to that thing in Ohio. I'm hoping to have some kind of Ontario H-body convoy, that would be pretty cool. (Plus more cars means more tools and spare parts in case someone breaks down)

Here's something I forgot to add last time. I got my grill support modified to fit with the new rad location plus 1-1/2" clearance for an A/C condenser. Forgot a before pic but here`s an after- Fits nice and should look pretty stock once I get some semi-gloss black on it. If anyone can send me a pic of a stock one that would be awesome

Image

For anyone who`s interested the hood shocks are approx. 16-3/8 extended, 10 compressed between mounting bolts and came from a Chevy Aveo I believe. The mount on the hinge is approx. 6-1/2 from the pivot point, other side I can measure next time I`m working on it.

Phill
User avatar
76wagon
 
Posts: 375
Joined: Tue Mar 06, 2012 2:54 pm
Location: Kitchener, Ontario

Re: 76 Wagon Project

Postby chevyart » Tue Feb 10, 2015 8:32 pm

phil pretty damned neat way you mounted the fan shroud. does the water pump shaft come close to(or go through the fan shroud), and coming real close to radiator core. did you move the radiator back. whAT IS THAT NICE DUAL FAN SETUP OFF OF, and what is the total width and height of the radiator? for some reason i think we had conversed about a radiator support for your car(early vega) i still have a perfect one, all painted up. my car is a 75, so i cant use it. art
chevyart
 
Posts: 1965
Joined: Fri Oct 27, 2006 10:00 pm

Re: 76 Wagon Project

Postby 76wagon » Tue Feb 10, 2015 9:25 pm

Thanks Art, it works even better than I imagined it would. The rad has been moved forward a bit, that`s why I had to use the inline water neck since the rad cap would have ended up under the upper valance. I forget how much clearance I have between the shroud and water pump but there`s enough to easily change the belt.

Here`s the rad I`m using- http://www.summitracing.com/int/parts/g ... /overview/ Had to get some mounts welded on before I could use it, good thing I work with some awesome welders. That fan setup is from a Prius. Fits almost perfectly, really thin and moves a ton of air. As for that support, I don`t need another one, just looking for a pic of a stock one to post up beside the modified one for a comparison.

Phill
User avatar
76wagon
 
Posts: 375
Joined: Tue Mar 06, 2012 2:54 pm
Location: Kitchener, Ontario

Re: 76 Wagon Project

Postby Vegabee » Sat Feb 14, 2015 4:45 pm

I changed my support just like that when setting my rad into the core support.
Image
determine cuts
Image
Image
Image
welded,ground
Image
User avatar
Vegabee
 
Posts: 213
Joined: Tue Oct 19, 2010 1:31 pm

Re: 76 Wagon Project

Postby 76wagon » Wed Feb 18, 2015 9:07 pm

Got some more done over the past week or so. Fenders and header panel are in primer, fenders are painted black inside and mounted (hopefully) for good now. For primer I used a 2K urethane, cost $170 for a gallon but this stuff is AWESOME! I can actually handle the parts and knock them around without worrying about chipping any off, don't need to worry about it coming off with masking tape, I'm never going back to cheap primer.

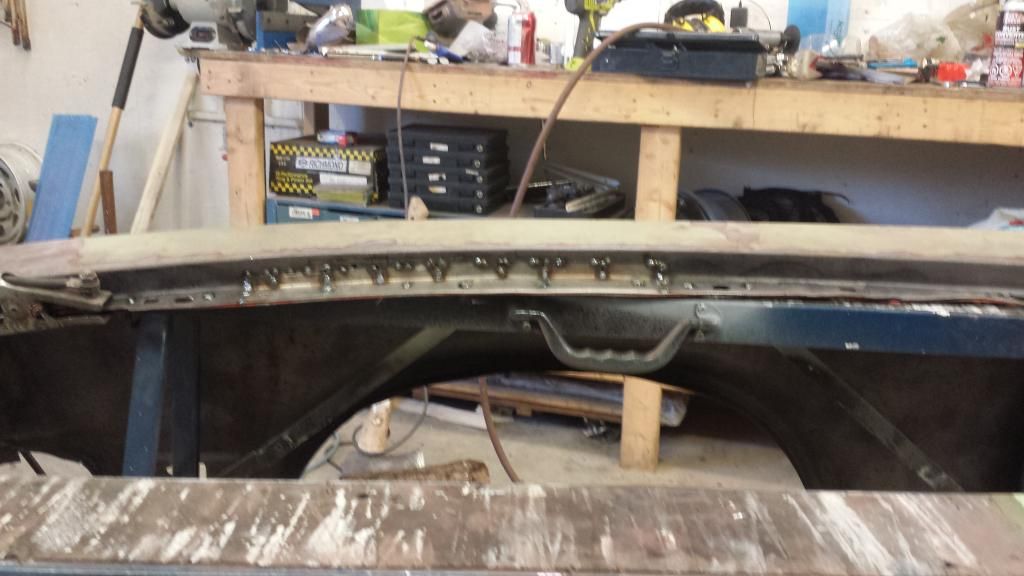
Before any primer I had to get the passenger fender fixed. The support piece along the mounting flange was too far gone, along with some of the flange. Fabbed up a patch for the flange and took the support piece from my old fender. Here's everything tacked together.

Image


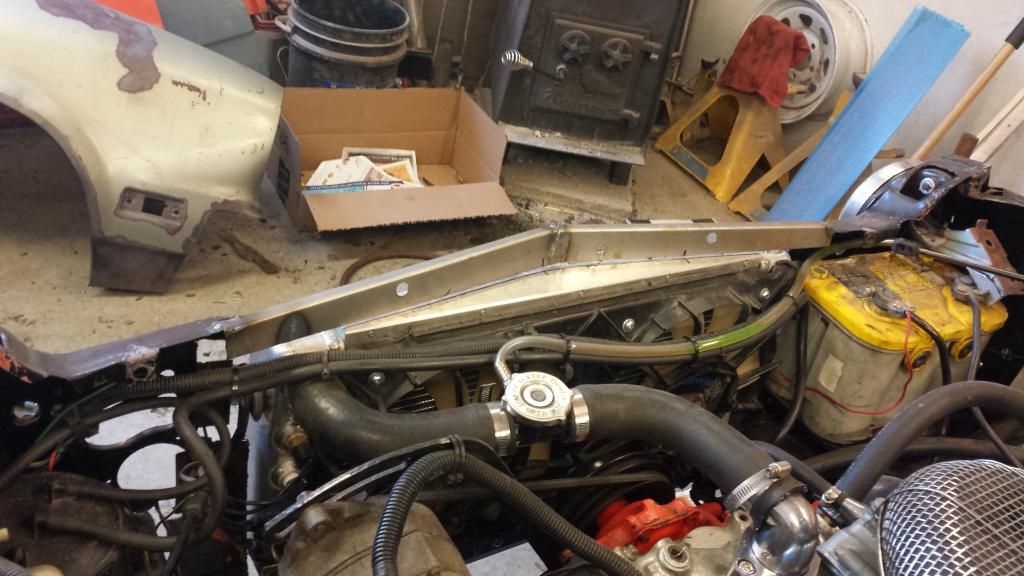
Since I had removed the center part of the rad support that the header panel mounts to, I had to make a new one. Mounted it to the header panel, mounted the header panel and tacked it in place. It leaves about 1/8" clearance to the rad, just enough to slip on some rubber edging or to get out the rad if I need to. Should look pretty nice when everything's together.

Image


Image


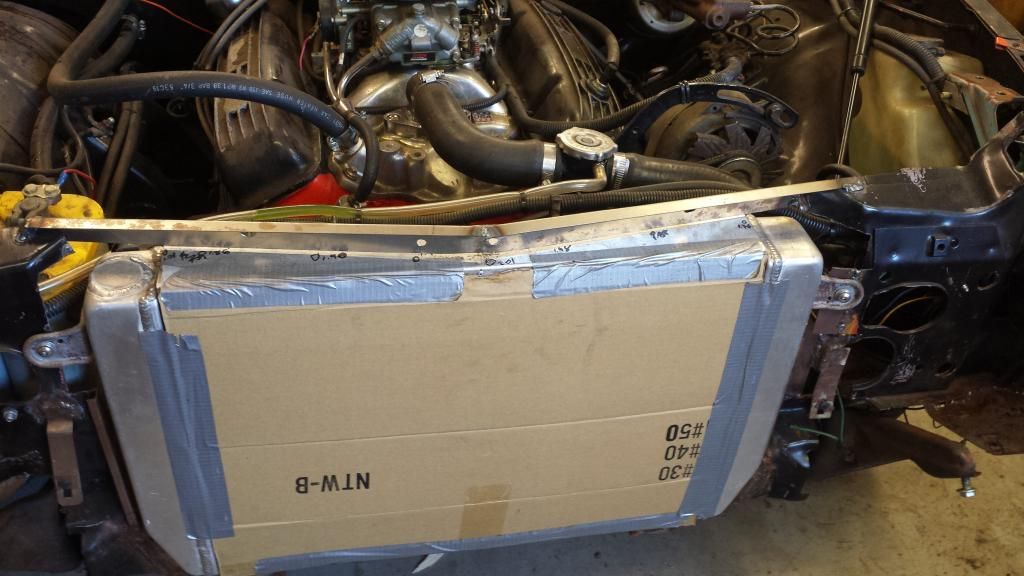
Here's everything together from the rear. I finished the hood hinges and primed them with the fenders, they look way better now. After some spot putty to smooth out the welds and a coat of semigloss black they should look pretty stock. Also got the lower mounts finished, nothing crazy but I think they'll look like they belong once I get everything painted up nice.

Image


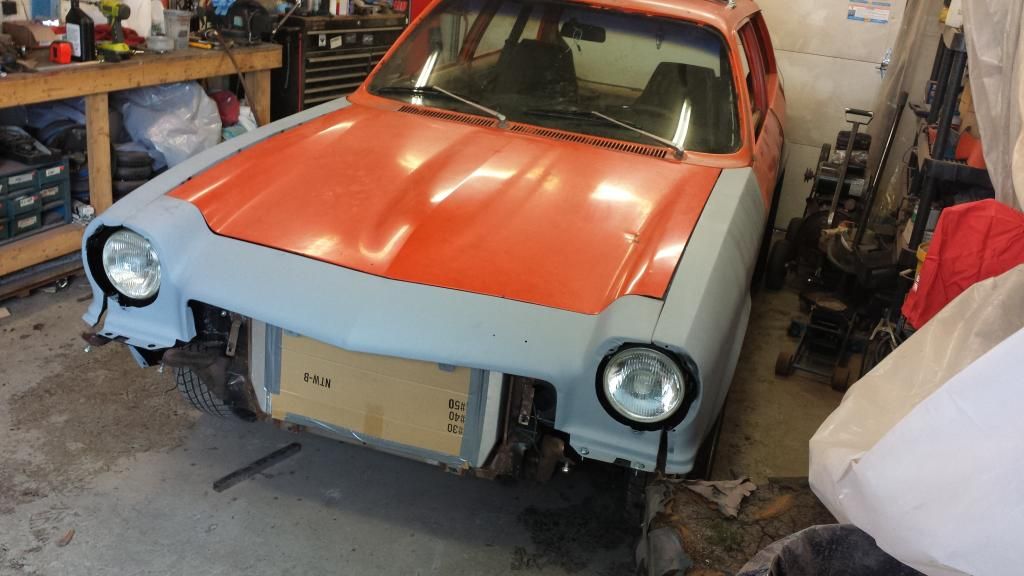
And here's how I left it this morning. Fenders are lined up to the doors, next is lining up the hood. You can see how bad it is even in the picture but that's why I changed it to bolt-on hinges. Slot some holes and I've got it centered. The worst part will be getting the curve of it to line up with the fenders. At some point it looks like something really heavy hit it on the drivers side- it's low in the center and high front and back. Plus the front corner is bent up over top of the hinge. Gonna need some persuading to get it back into shape.

Image

This weekend's plan is to get the rust fixed on the doors and the hatch and get a coat of primer on them. Once that's done I can pretty much park the welder and get ready for priming and block sanding till about May...
User avatar
76wagon
 
Posts: 375
Joined: Tue Mar 06, 2012 2:54 pm
Location: Kitchener, Ontario

Re: 76 Wagon Project

Postby project v » Sat Mar 14, 2015 11:46 am

Vega is looking great. I have a 1976 vega wagon also. And I'm currently changing it over to 72 looks. I have a few question for you. My front end is done. However, I'm having a little more trouble with the rear bumper and valance change. Do you know if the wagon and hatchback rear bumpers are the same width ? It just seem the gap between the fender and bumper edge is bit excessive. What is the gap on yours ? I had a conversation with Dave at Daves Vega Village yesterday about the valance. He said had that the cutout dimensions on the rear quarter were different than the 72 wagon valances he makes. I can see the contour doesn't match by holding a set of valances to the car. He said he made a set for a guy with 76 Cosworth by adding an inch to the front edge of the valances with success. Also I was wondering if you had more details on the brackets for mounting the bumper (pictures ?). Any info would be greatly appreciated. Thanks, Steve.
project v
 
Posts: 1
Joined: Sat Mar 14, 2015 8:18 am

PreviousNext

Return to Project Journals

Who is online

Users browsing this forum: No registered users and 3 guests